Changing your Site Settings and branding
Site administrators can add manage and change the internal and external-facing appearance of their site, including naming, colours and brand logos.
For more information about Site administrators and other users, refer to Summary of user roles for your data portal.
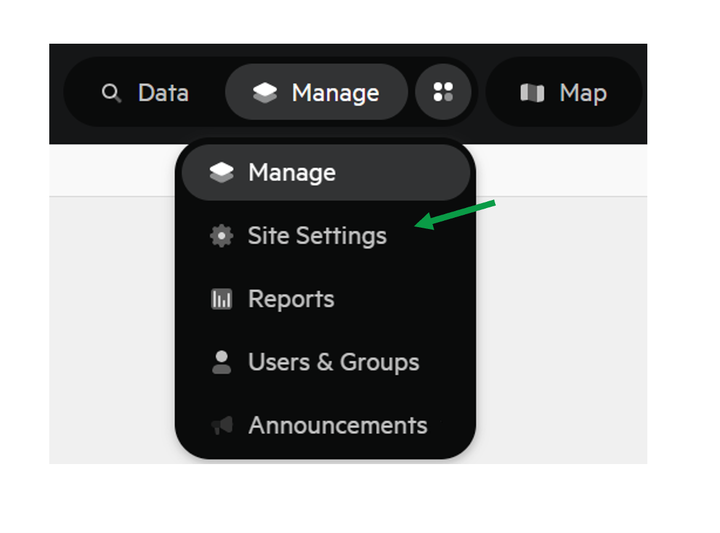
1. From the top navigation menu, select Site Settings
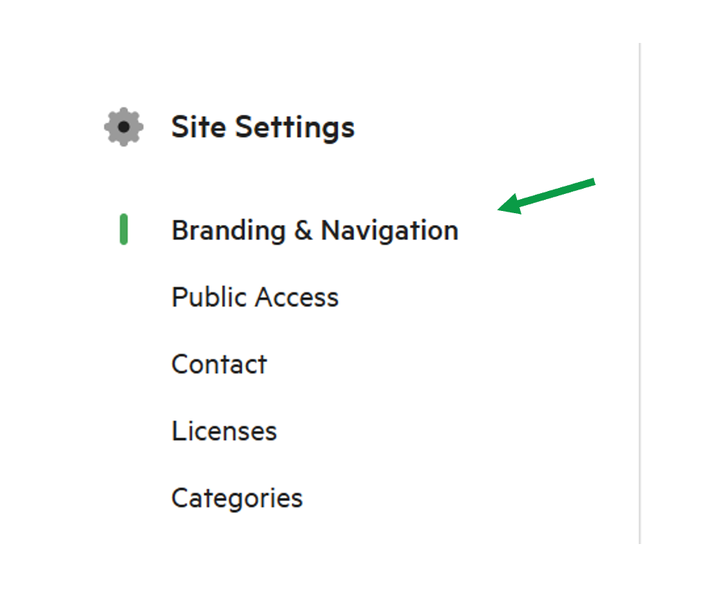
2. On the left menu list select 'Branding and Navigation'
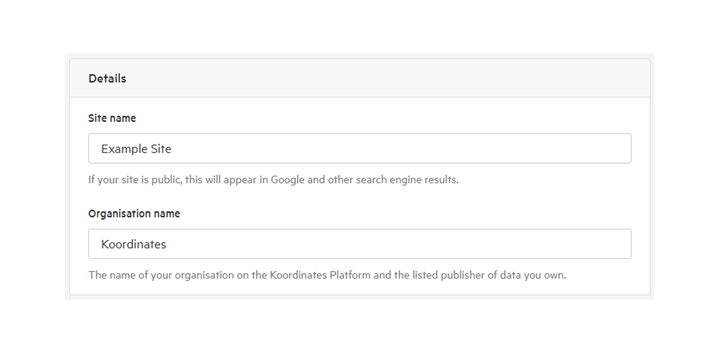
3. Edit your site and organisation names
At the top of the Site Settings page, you are given the option to choose the name of your site. Below this, there is also a section to add the name of your organisation . Complete the form fields to change these titles.
Your site name will appear in web search results (for public-facing sites only).
Your organisation name will be used to show data ownership on the Koordinates Platform, and appear in search results and datasets throughout.
4. Add Icons to your site
After choosing your site style, you have the ability to add your organisation's logo. This will appear next to your site name when your site is opened in web browser windows.
Alternatively, you can choose to use initials in place of an icon.
To upload an icon, click the 'Upload Icon' button, navigate to the file you would like to use, and choose 'Open'.
Choose a website icon
You can also add a website icon or favicon to your site, which will be displayed next to your site name on browser tabs, bookmark bars and in search histories. this will help your site stand out for users.
To add a website icon, click 'Add website icon' and select the file from your computer or network drive.
We recommend you use a 64 by 64 pixel image with a transparent background for the best clarity.
5. Customising your site branding and colour
In this section, you are able to change the overall appearance of your site. Options include banner and menu colouring, as well as primary and secondary logos.
To add your site logo, select the 'Add logo' button, navigate to the file you would like to your and select 'Open'.
This logo will appear in the top left of your page at all times. You are also able to add a secondary logo. This can be useful if you are hosting data for a specific project or client, allowing you to make a bespoke co-branded site.
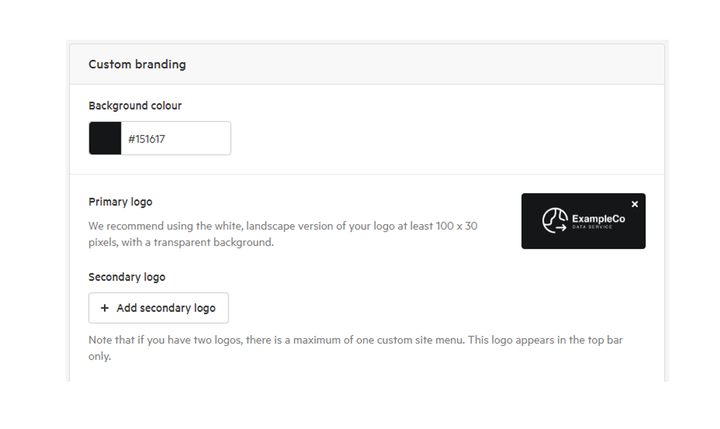
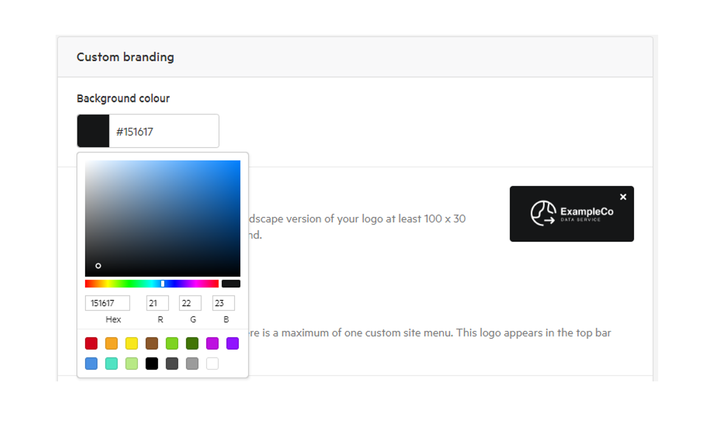
Background colour can be selected by inputting your brand colour via standard Hex colour code. A Hex code is 6 alphanumeric characters, usually available from your marketing or design team.
Alternatively, you can choose a colour using the palette selector.
Click on the colour indicated in the 'Background Colour' section, then choose a base colour from the options. From here you can find an applicable shade within the gradient tile pop-up.
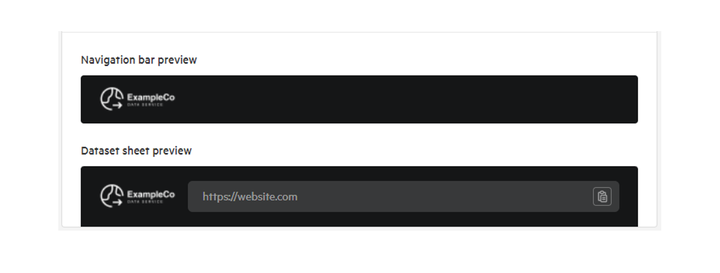
Previews of the appearance of your site logo and colour are shown below, and updated in real-time with any changes you make. These will not be reflected on your site until you confirm the changes at the end of this section.
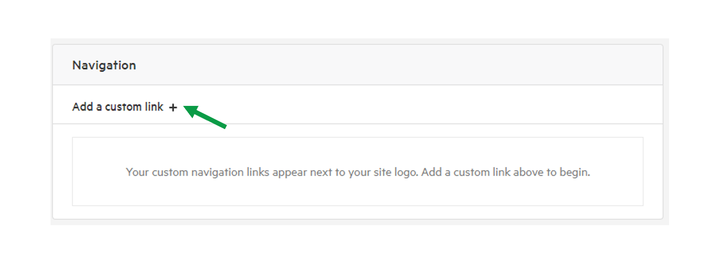
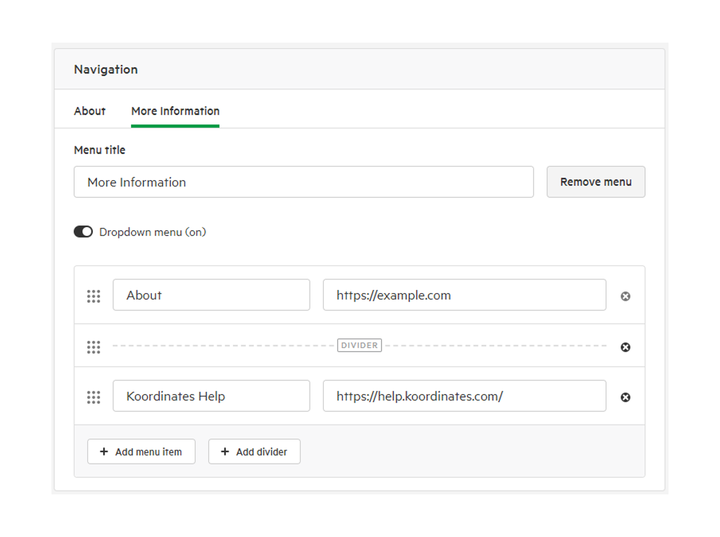
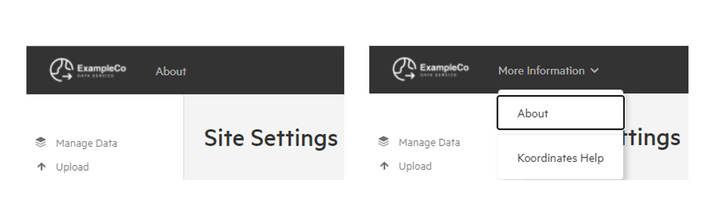
6. Custom navigation menu
You are able to customise the the top navigation menus on your site. You can have one or many direct links which are always visible in the top navigation bar, or arrange your useful links within one or many drop-down menus. This is a useful way to share custom help documentation.
To create a link, enter a name and URL into the form fields.
You can also choose whether a drop-down menu appears for each link using the 'Dropdown' toggle.
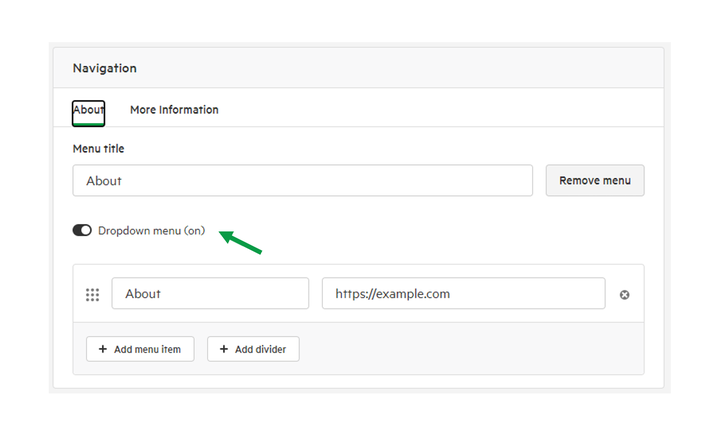
If this option is chosen, you are able to add additional menu items and section dividers.
7. Save and display your changes
To implement and display your new site settings and branding, select 'Save Settings' at the foot of the settings page.
This will update your site to show your selected branding, title, colours and logos.