
Manually update a published dataset
This guide explains how to update a published dataset with new data, either from a file you upload or from a connected data source. You can start from the new data or from the dataset. Both ways take you to the same update page.
To update a dataset automatically on a schedule instead, see Schedule regular updates of your data. To update data with the Koordinates APIs, see Site admin APIs.
Start from the new data
Section titled “Start from the new data”Use this method when you’ve just uploaded new data, or when a scan of a connected source has found updated data.
-
Open the upload or source
Select Manage in the navigation menu to open the Data Manager. For a new file, select Upload, add your file and select Start upload. The upload opens on the Uploads tab when it’s ready.
For a connected source, select the Sources tab and select the source. Scan it first if it may be out of date: see Scan and manage connected data sources. To see only items that can update an existing dataset, select Filters, then Update available.
-
Tick the new data and select Update existing dataset
-
Choose the dataset to update
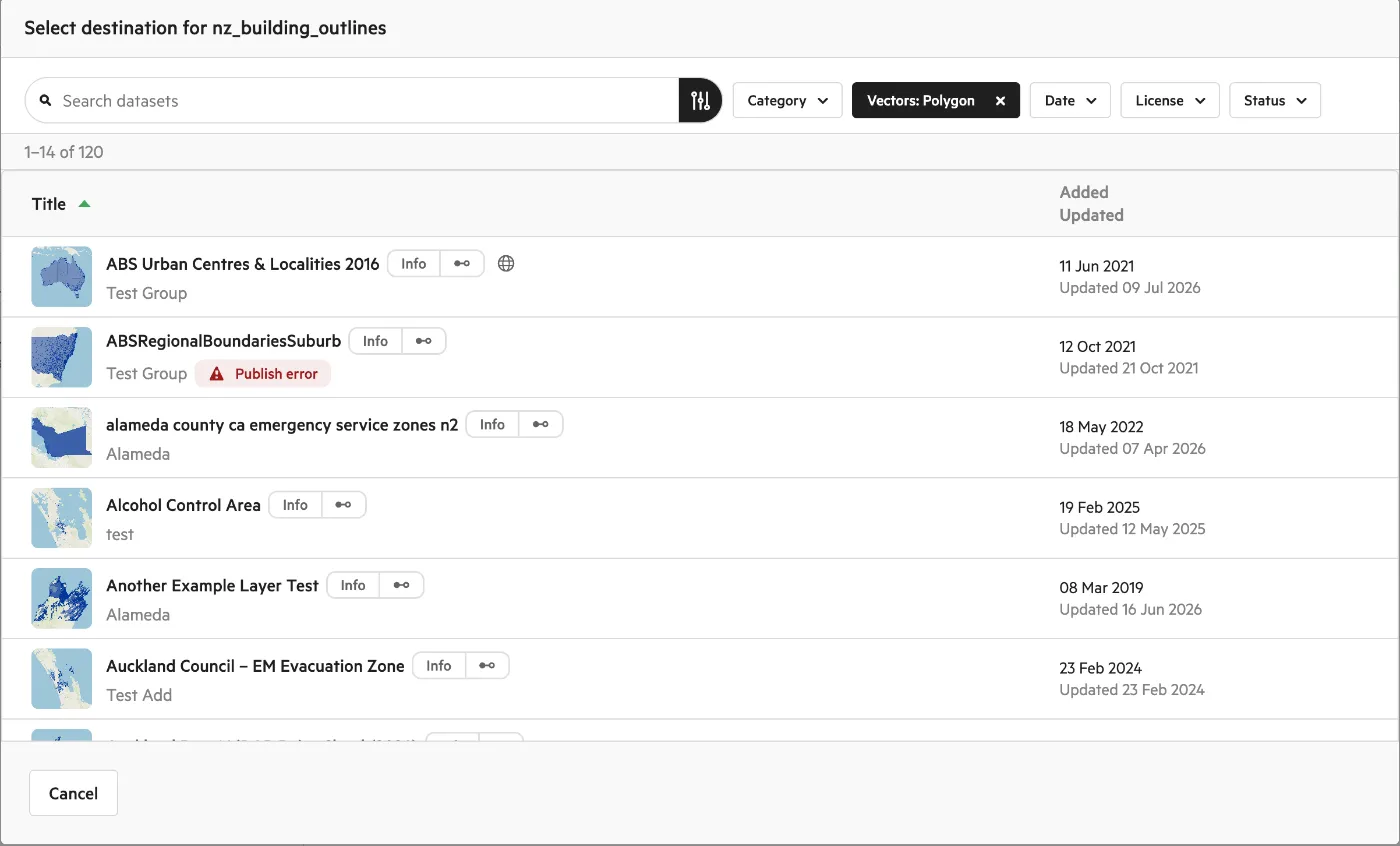
In the Select destination window, find the dataset you want to update and select it. The list is filtered to datasets of the same type as your new data, such as Vectors: Polygon; select the × on the filter to see all datasets. The update page opens.
-
Finish the update
Follow the steps in Check and publish the update.
Start from the dataset
Section titled “Start from the dataset”-
Find the dataset
In the Data Manager, on the Datasets tab, find the dataset you want to update. To see only datasets that a connected source has new data for, select Status, then Update available.
-
Open the dataset, then select Options and Update
The update page opens.
-
Add the new data
Under Data Source, select Add to choose new data from a connected source or an earlier upload, or to upload a new file. If Koordinates can’t find the dataset’s current source, you’ll see Add From Source and Upload instead.
Items that can update the dataset show Update Available. To remove an item you’ve added, select Remove.
-
Finish the update
Follow the steps in Check and publish the update.
Check and publish the update
Section titled “Check and publish the update”-
Check the dataset details
Under Destination for Update, check that you’re updating the right dataset. To change its title or other details, select Edit Details.
-
Check the new data
Under Data Source, check the data you’re updating from. A table compares the Existing Data with the New Data: its data type, feature count, coordinate system and attribute columns, with a tick in Match for each one that’s the same.
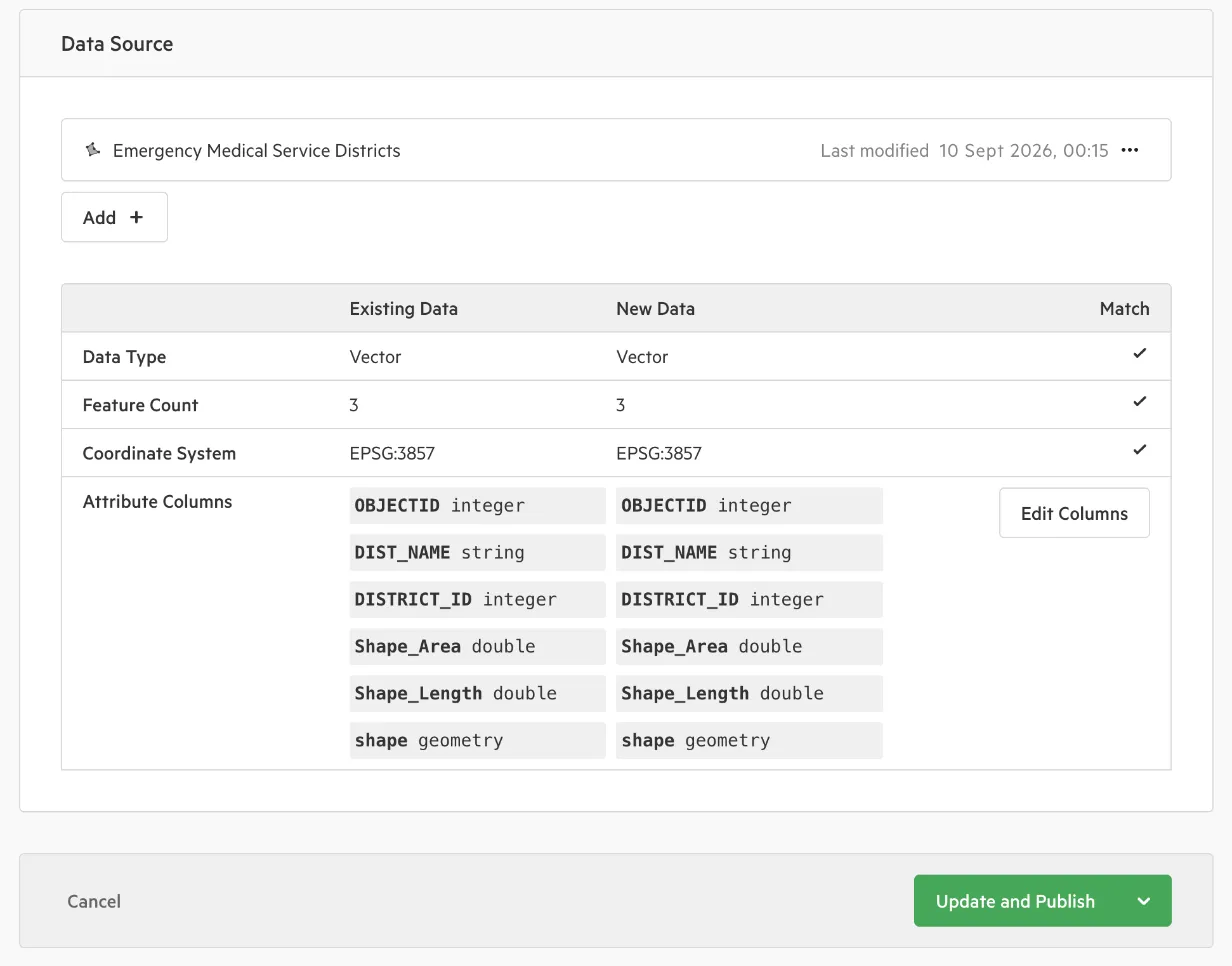
For vector and table data, you can select Edit Columns to rename, remove or reorder its attribute columns. See Edit attribute columns during import or update.
For raster and grid data, choose whether to Keep existing layer tiles and append/replace new tiles, or to Clear existing tiles and only use new tiles.
-
Add a revision message (optional)
A short revision message helps you and your users see what changed in this version.
-
Publish the update, or save it as a draft
Select Update and Publish to publish the new data straight away. To check the update before your users see it, select the arrow beside the button and choose Update and Save Draft. You and others who can manage the dataset can then review the draft before you publish it. See Manage data updates and QA using drafts.