
Create a Group
-
Go to Manage > Users
Select Manage at the top of the page, then Users.

-
Select New
Select New beside Search groups, at the top of the list of groups on the left of the page.
-
Name the group
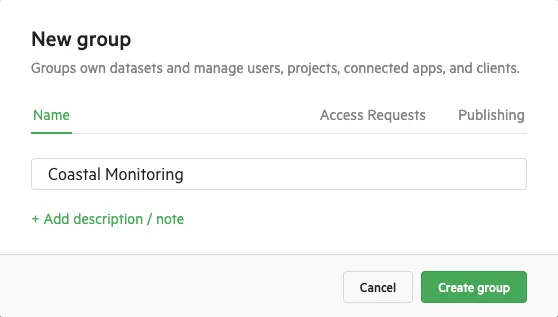
On the Name tab, give your group a name your users will recognise. To add a description or note, select Add description / note.
-
Choose the group’s settings
These are optional, and you can change them later:
- Access Requests tab: turn on Enable access requests to let users request access to restricted data the group owns. The group’s administrators receive and manage the requests. See Allow users to request access to a group.
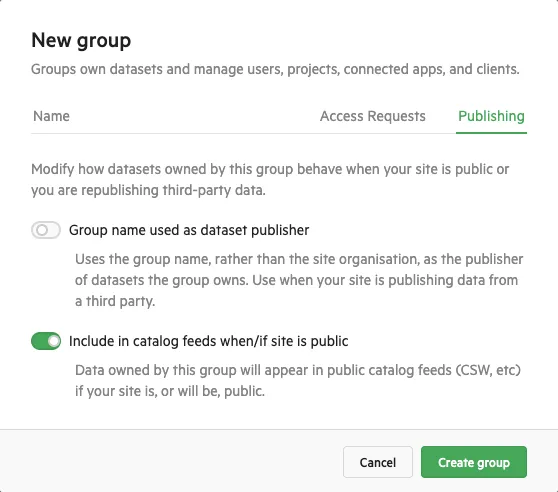
- Publishing tab:
- Group name used as dataset publisher lists the group, rather than your organisation, as the publisher of the group’s datasets. Use this when your site publishes data from a third party.
- Include in catalog feeds when/if site is public makes data the group owns appear in public catalog feeds, such as CSW, if your site is, or becomes, public. It’s on by default.
-
Select Create group
Add users to the group
Section titled “Add users to the group”Once the group exists, add users to it and choose a role for each person:
- Group member
- Manage datasets (needs a Paid Seat)
- Manage group (needs a Paid Seat)
See user roles and permissions for what each role can do.