
Find and manage registered users
Find a registered user
Section titled “Find a registered user”-
Go to Manage > Users
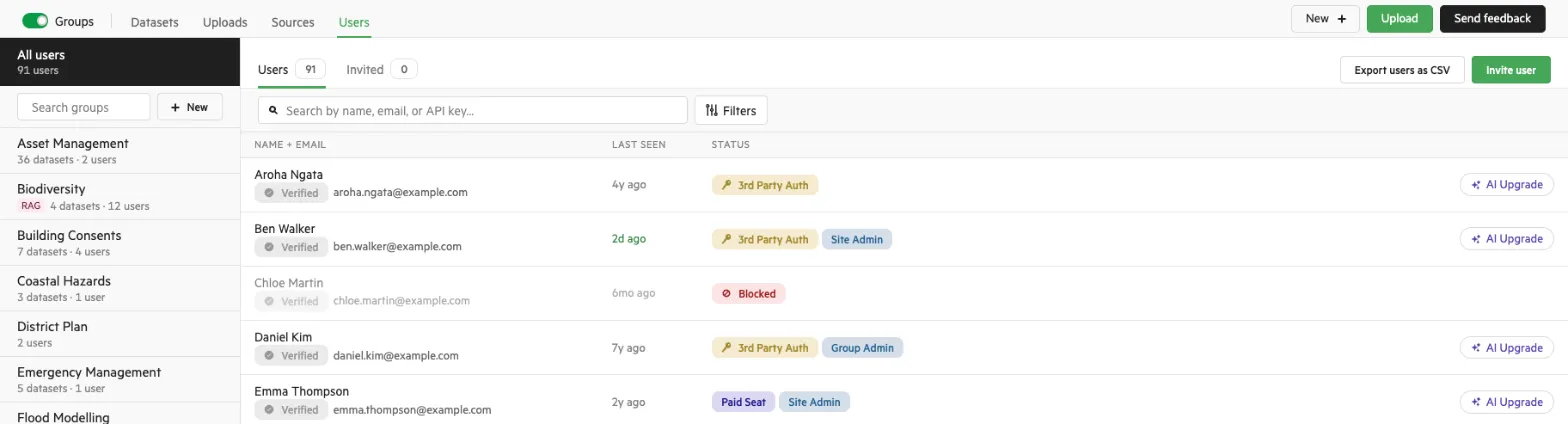
Select Manage at the top of the page, then Users. All users lists everyone registered on your site, with their status.

-
Search by name, email or API key
Type in the search box above the list.
-
Filter the list
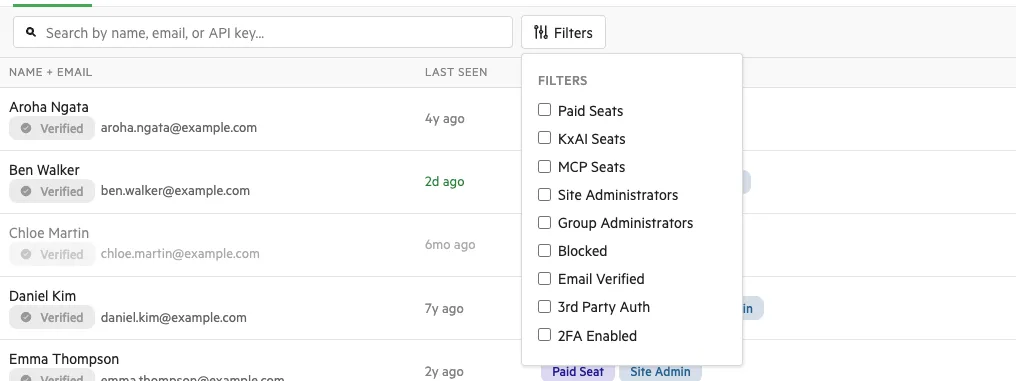
Select Filters to show only some users:
- Paid Seats: users with data management rights, who count towards your plan’s seats.
- KxAI Seats: users with access to KxAI.
- MCP Seats: users with an MCP connection to your site.
- Site Administrators: users with full site administration rights.
- Group Administrators: users who administer one or more groups.
- Blocked: users who are blocked from your site.
- Email Verified: users who verified their email address with a verification link, or through a third-party authentication provider.
- 3rd Party Auth: users who sign in through an authentication provider linked to their organisation.
- 2FA Enabled: users who have set up two-factor authentication for extra account security.
-
Select a user
Select a user’s name to open their details, where you can manage them as described below.
User details
Section titled “User details”A user’s details show their email address and status, their seats and admin rights, and the groups they belong to.
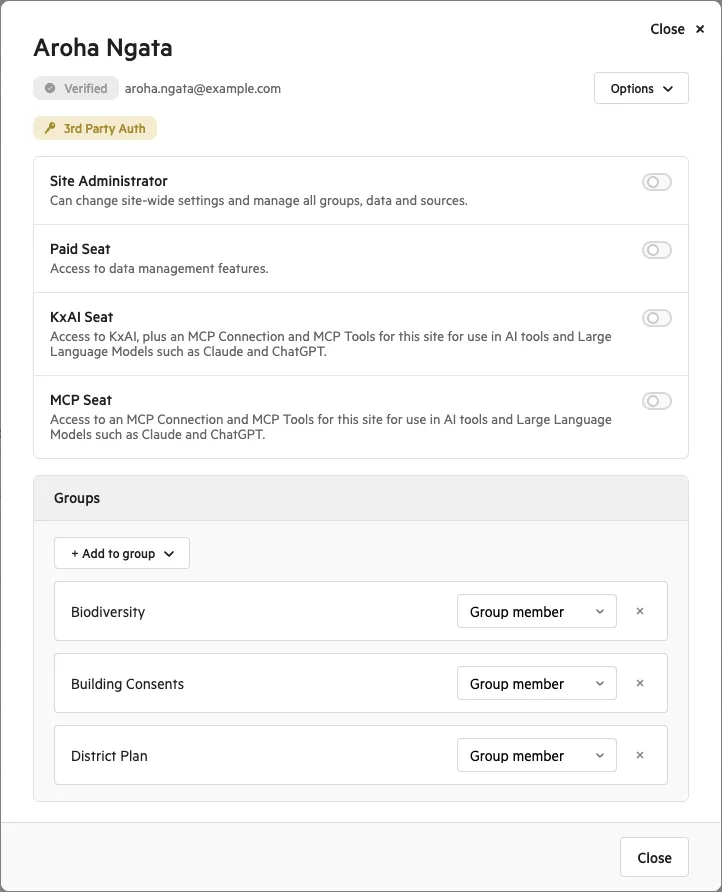
Each switch gives the user a role or seat:
- Site Administrator: change site-wide settings, and manage all groups, data and sources.
- Paid Seat: access data management features.
- KxAI Seat: access KxAI, plus an MCP connection and MCP tools for this site, for use in AI tools such as Claude and ChatGPT.
- MCP Seat: an MCP connection and MCP tools for this site, for use in AI tools such as Claude and ChatGPT.
See user roles and permissions for what each role can do.
Make a user a Site Administrator
Section titled “Make a user a Site Administrator”In the user’s details, turn on Site Administrator. The user’s status in the list of users then shows Site Admin.
Give or remove a KxAI or MCP Seat
Section titled “Give or remove a KxAI or MCP Seat”-
Turn on the seat
In the user’s details, turn on KxAI Seat or MCP Seat.
-
Confirm the seat type
In the Upgrade … to an AI seat window, check the seat type and select Upgrade to KxAI Seat or Upgrade to MCP Seat.
-
Save
Select Save changes.
Things to know:
- A KxAI Seat includes an MCP Seat. Turning on KxAI Seat turns on MCP Seat too, and the MCP Seat switch stays locked while the user has a KxAI Seat.
- Your plan sets how many seats you have. When they’re all in use, you can’t turn the switch on, and a note under it says so. Remove a seat from another user to free one up.
- New seats need a card on file. KxAI and MCP Seats are billed to a credit card. If there’s no card on file, you can’t give a new seat until you add one. Seats users already have aren’t affected.
- Monthly credit cap. When a user has a KxAI Seat, you can set the most they can spend from the site’s credit pool each month. A new seat starts with the site’s default cap. See KxAI credits.
To remove a seat, turn off KxAI Seat or MCP Seat, select Confirm, then Save changes. Removing a KxAI Seat removes the user’s access to KxAI and their MCP connection, and clears their credit cap. Removing an MCP Seat removes their MCP connection.
Users can also ask for a seat themselves. See Ask for a seat.
Add a user to a group
Section titled “Add a user to a group”-
Select Add to group
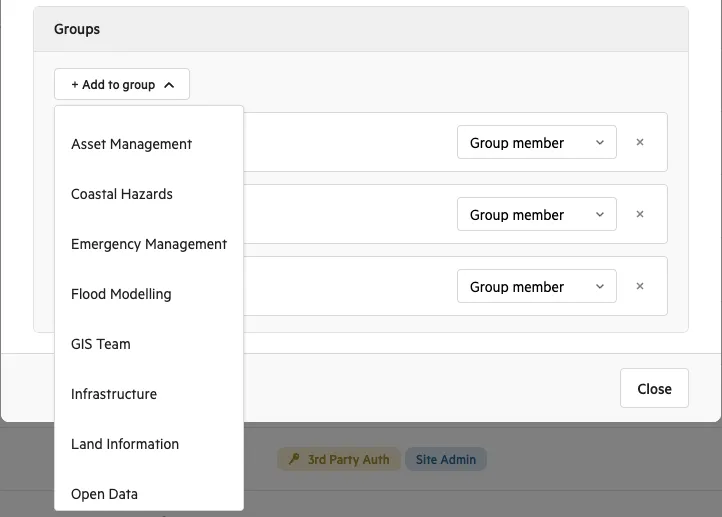
In the user’s details, select Add to group under Groups, then choose a group.
-
Choose their role
Choose the user’s role in the group from the list beside the group’s name:
- Group member: access the group’s data, including export, and access through the APIs if API access is turned on for your site.
- Manage datasets: everything a group member can do, plus import, update and edit the group’s datasets. Needs a Paid Seat.
- Manage group: everything above, plus manage the group’s members and their roles. Needs a Paid Seat.
To take someone out of a group, select the × beside the group’s name.
Block a user
Section titled “Block a user”In the user’s details, select Options, then Block user. See Block a user from your site.