Connect to an Amazon S3 data source (CloudFormation Template method)
In this guide, we explain how to import data to your Koordinates data service from an Amazon S3 data source (otherwise known as an S3 ‘bucket’).
This method involves using a CloudFormation Template generated by Koordinates, and is the recommended method for less experienced users of Amazon S3. For more advanced users, we have also documented how to import data using the AWS Web Console Wizard.
Read documentation from Amazon explaining CloudFormation in more detail.
How it works
Section titled “How it works”Instead of providing Koordinates with usernames, passwords or other sensitive credentials, you will create an AWS ‘Role’, and grant Koordinates permission to use that role. You control the role, and so you have absolute control over what resources Koordinates can access through it.
1. Select ‘Manage’ from the top navigation menu
Section titled “1. Select ‘Manage’ from the top navigation menu”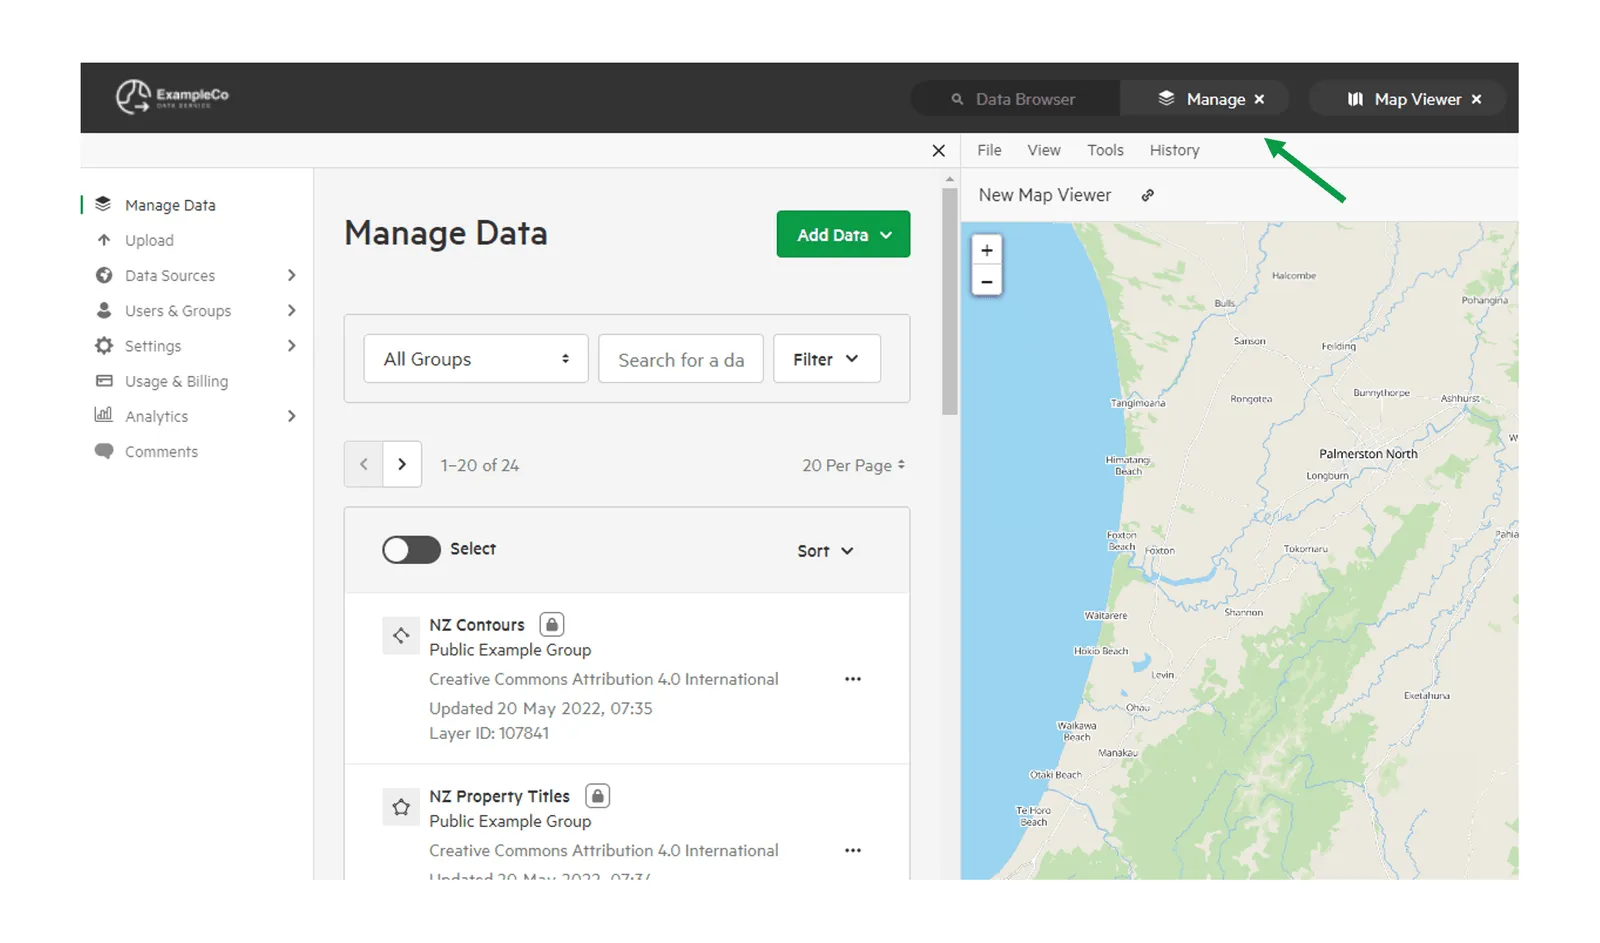
2. Click ‘Data Sources’ and select ‘Configure Sources’
Section titled “2. Click ‘Data Sources’ and select ‘Configure Sources’”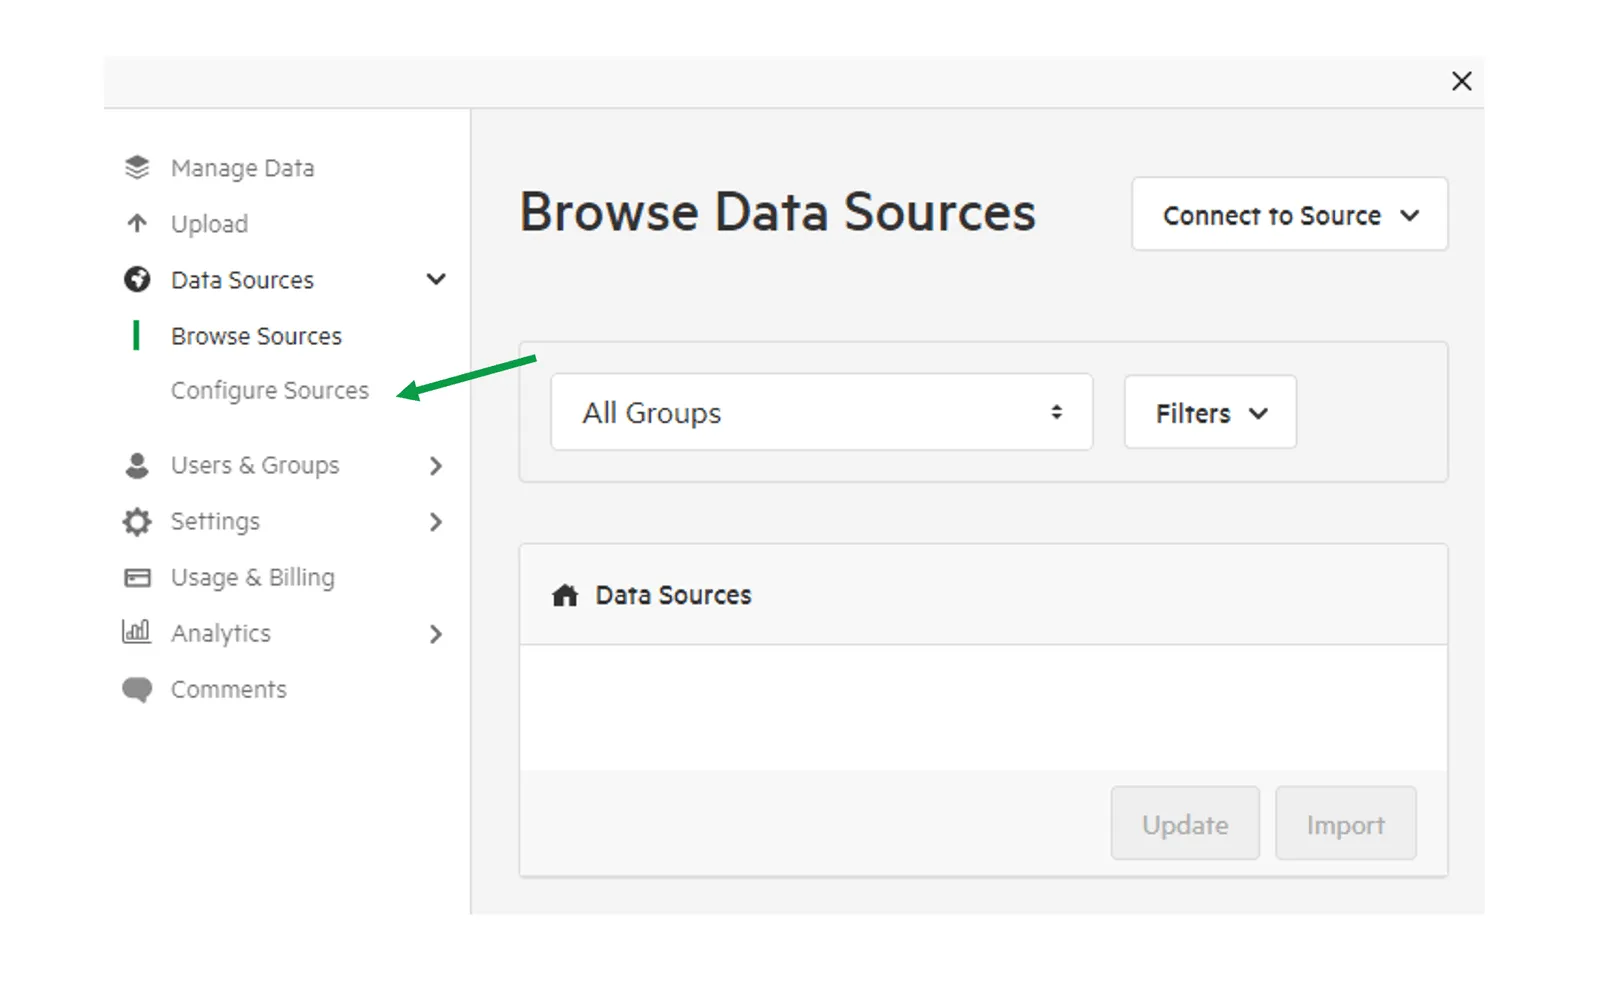
3. Click ‘Add a Source’ and select ‘Amazon S3’
Section titled “3. Click ‘Add a Source’ and select ‘Amazon S3’”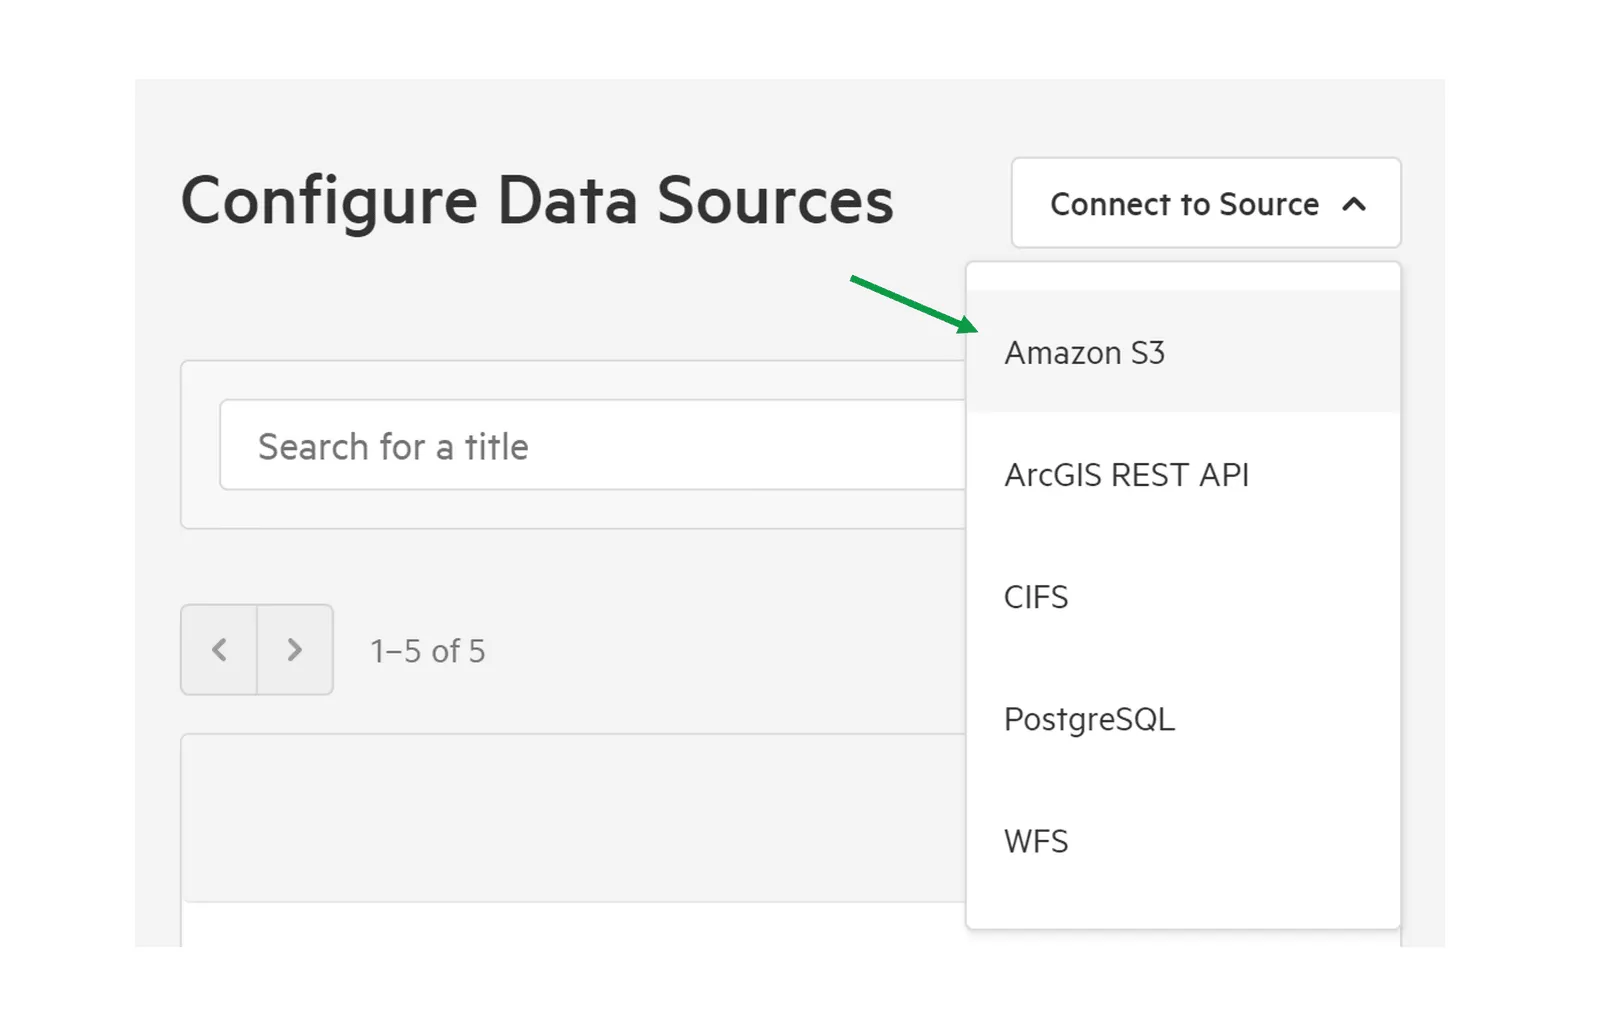
4. Enter the name of your S3 bucket and click ‘Download Template’ and save the JSON file.
Section titled “4. Enter the name of your S3 bucket and click ‘Download Template’ and save the JSON file.”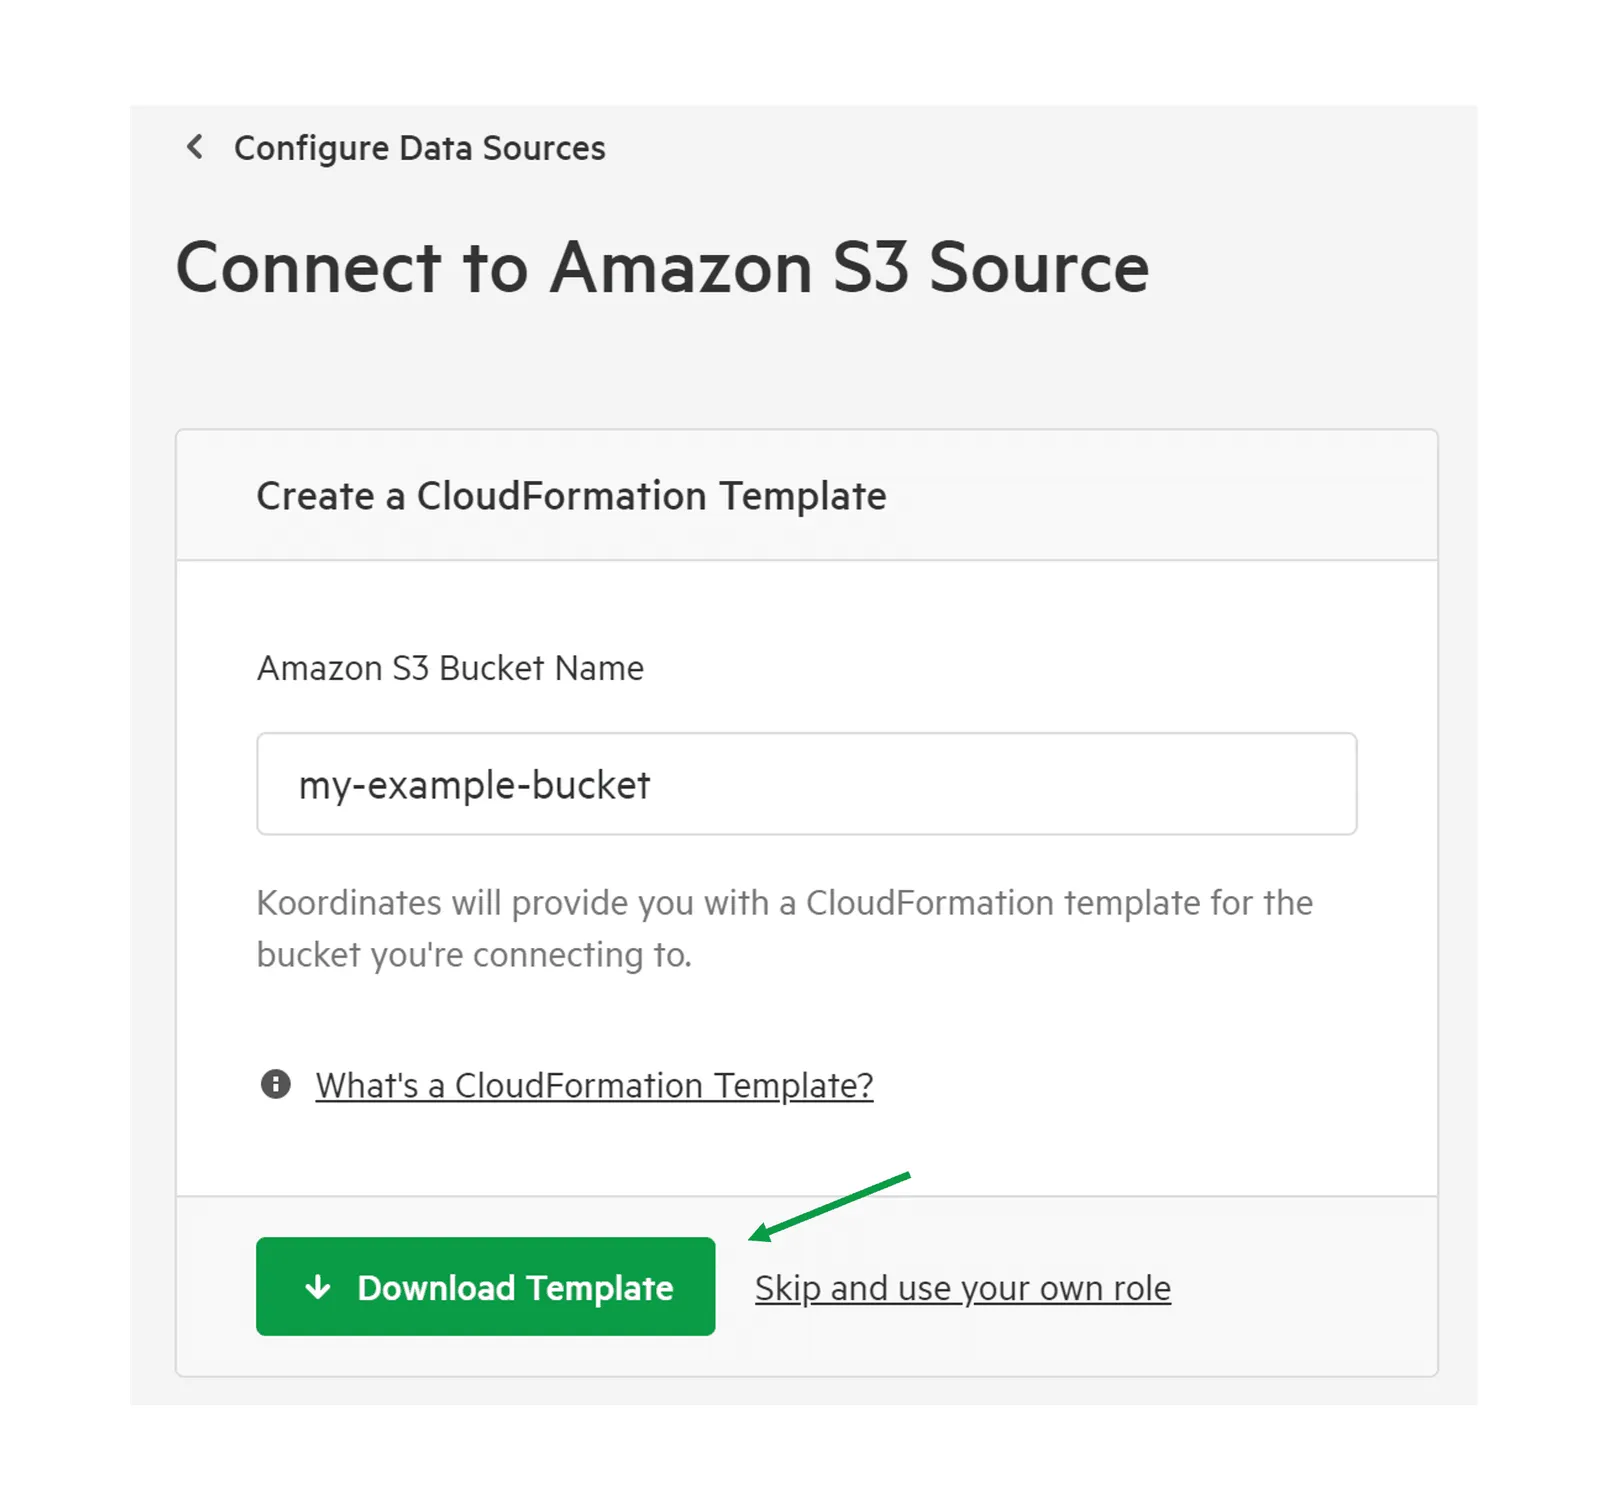
You’ll be using this JSON file later as a ‘Stack Template’ to connect your AWS S3 account.
5. Open a new tab, and navigate to AWS CloudFormation Console
Section titled “5. Open a new tab, and navigate to AWS CloudFormation Console”To learn more, read the AWS CloudFormation Console documentation.
6. Create a Stack on your Console
Section titled “6. Create a Stack on your Console”Do so following these instructions from AWS. After you have started the Create Stack wizard in AWS, you’ll be given the option of uploading a Stack Template.
7. Select ‘Upload a Template to Amazon S3’ and attach your JSON file from step 4.
Section titled “7. Select ‘Upload a Template to Amazon S3’ and attach your JSON file from step 4.”8. Name your stack (this can be anything you want)
Section titled “8. Name your stack (this can be anything you want)”Other than the name, you don’t need to edit any of the default settings on this page.
9. Accept the disclaimer and click Create
Section titled “9. Accept the disclaimer and click Create”10. Navigate to your newly created Stack in the AWS Management Console
Section titled “10. Navigate to your newly created Stack in the AWS Management Console”11. Select the ‘Outputs’ tab and copy the Role ARN Value
Section titled “11. Select the ‘Outputs’ tab and copy the Role ARN Value”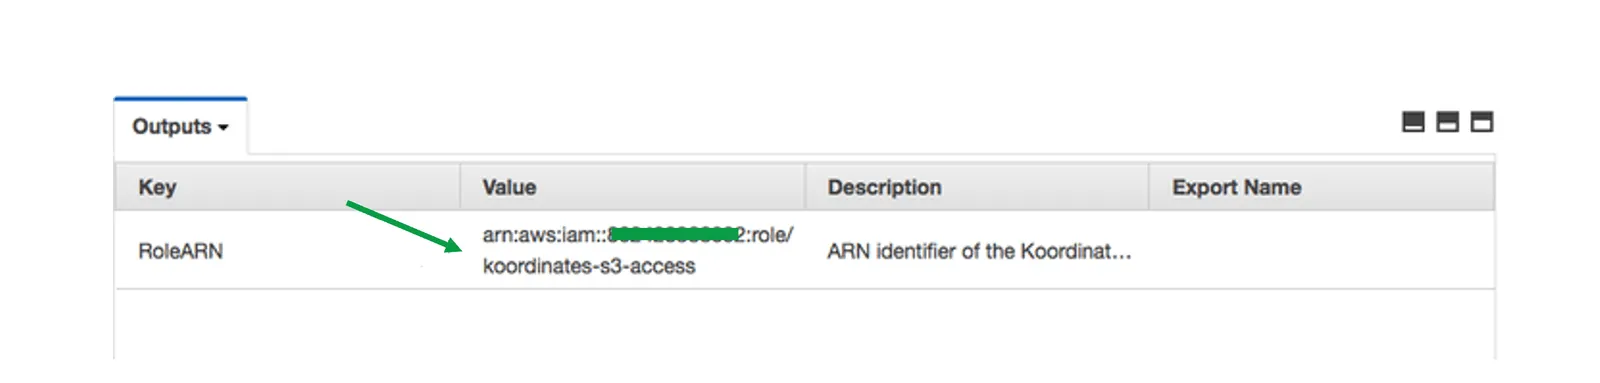
12. Return to ‘Connect an Amazon S3 Source’ and paste the Role ARN value
Section titled “12. Return to ‘Connect an Amazon S3 Source’ and paste the Role ARN value”You can also stipulate a directory for us to scan. This prefix tells Koordinates which parts of your S3 bucket to scan, and which parts to ignore.
Leave this blank if you want Koordinates to scan the entire S3 bucket.
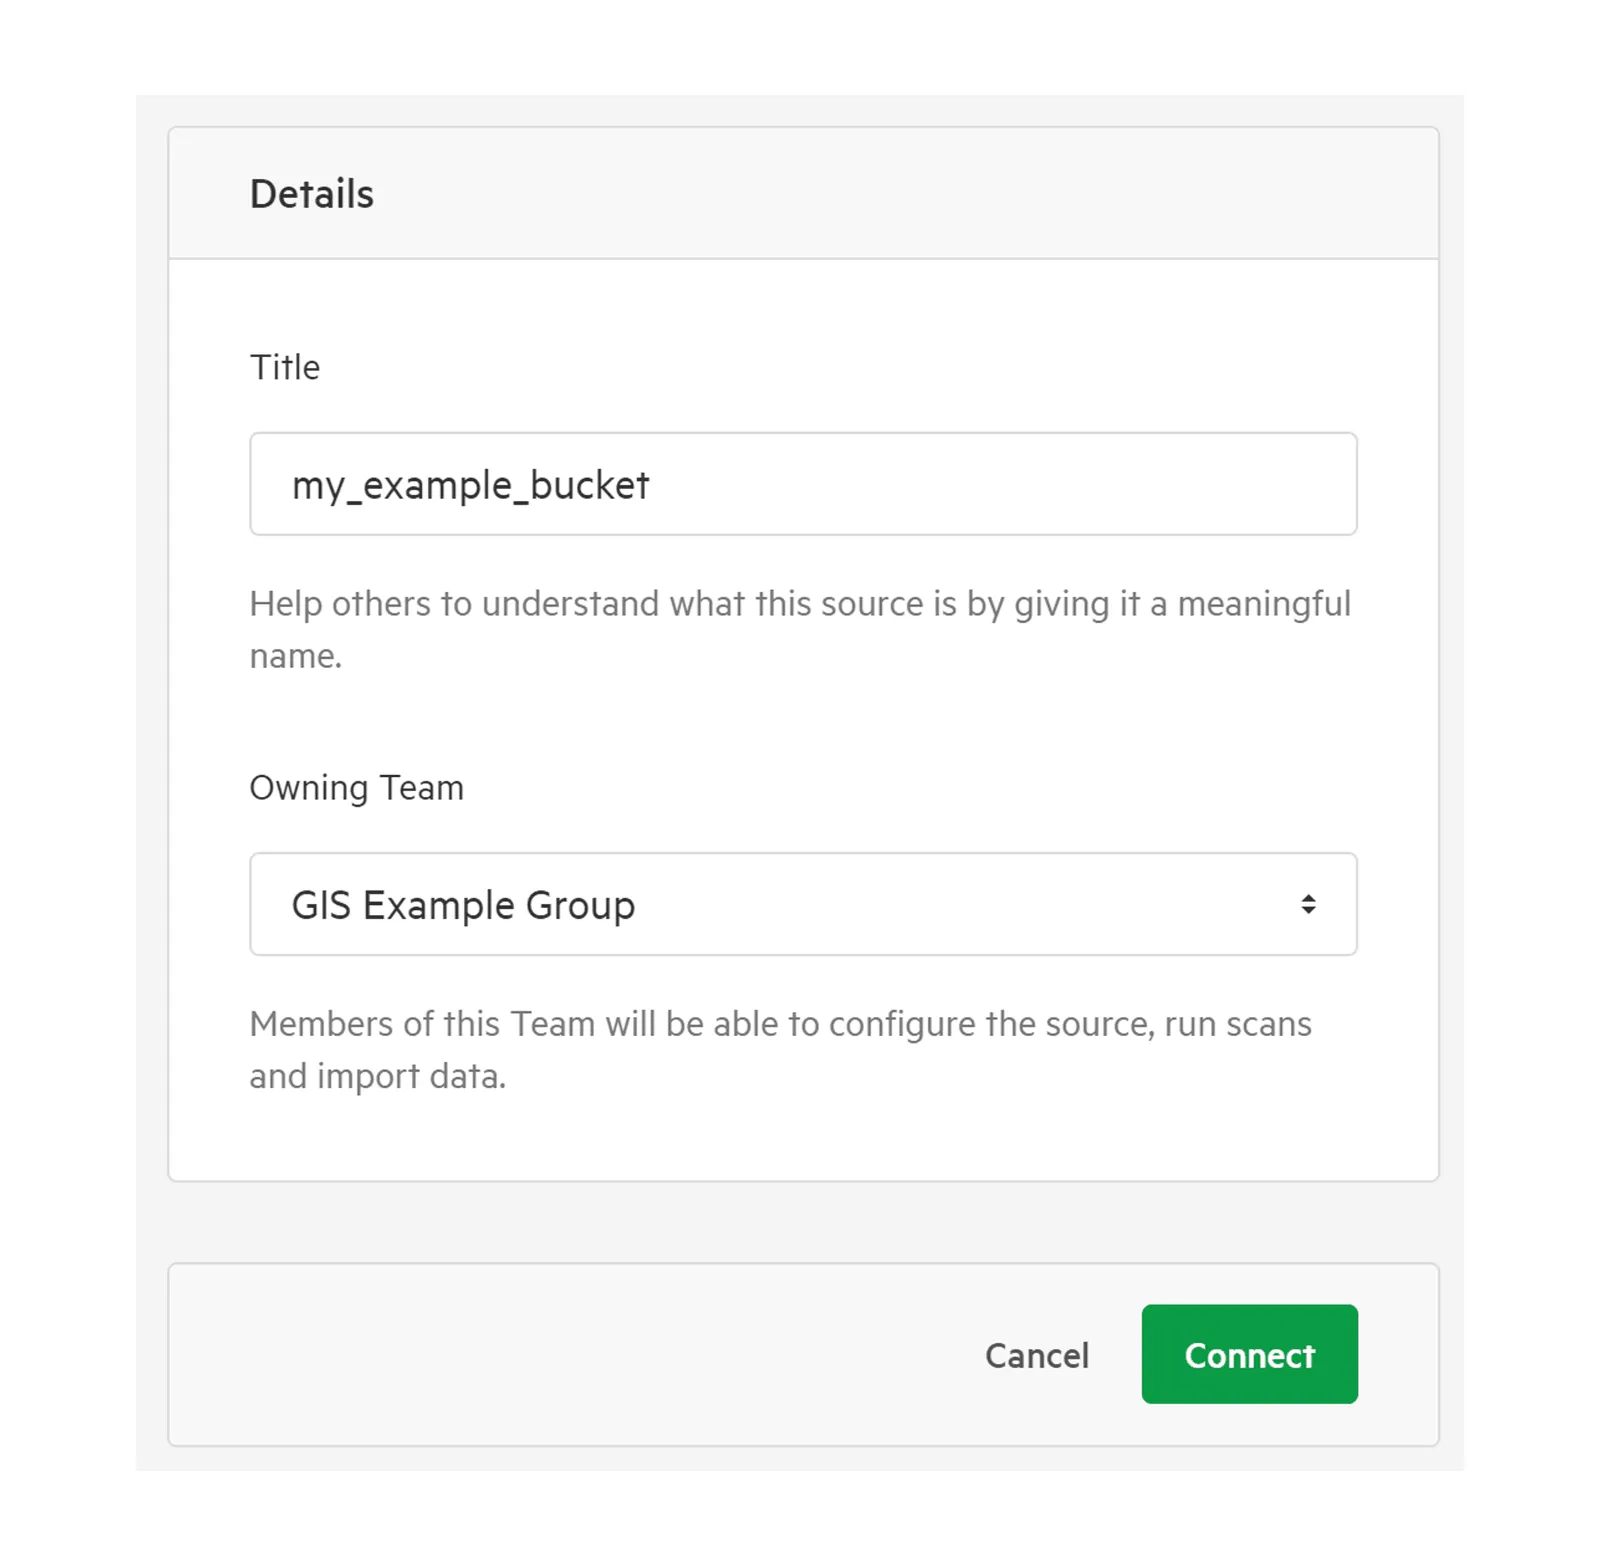
13. Add a title and owning-group, and then click Connect
Section titled “13. Add a title and owning-group, and then click Connect”