
Upload and manage documents
The process for uploading documents is similar to the manual upload process for datasets.
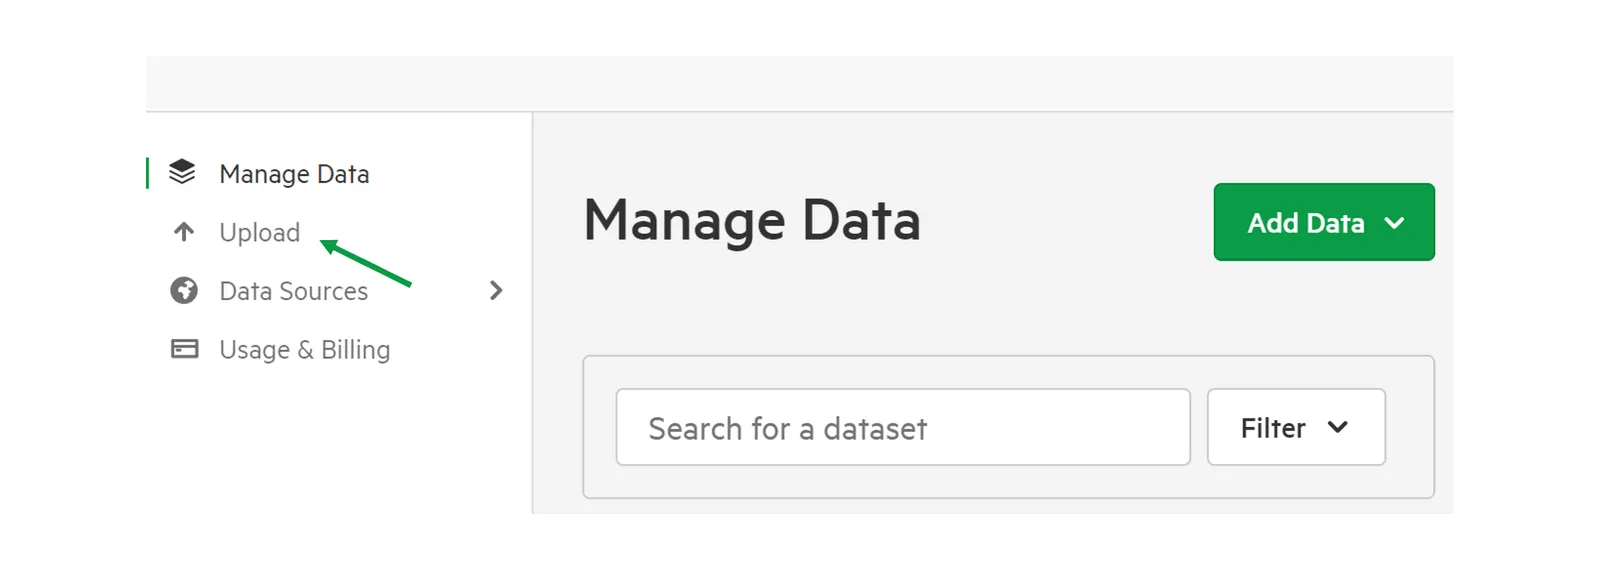
1. Select ‘Upload’ from the Manage Data menu
Section titled “1. Select ‘Upload’ from the Manage Data menu”This will allow you to browse for a file on your hard-drive to upload.
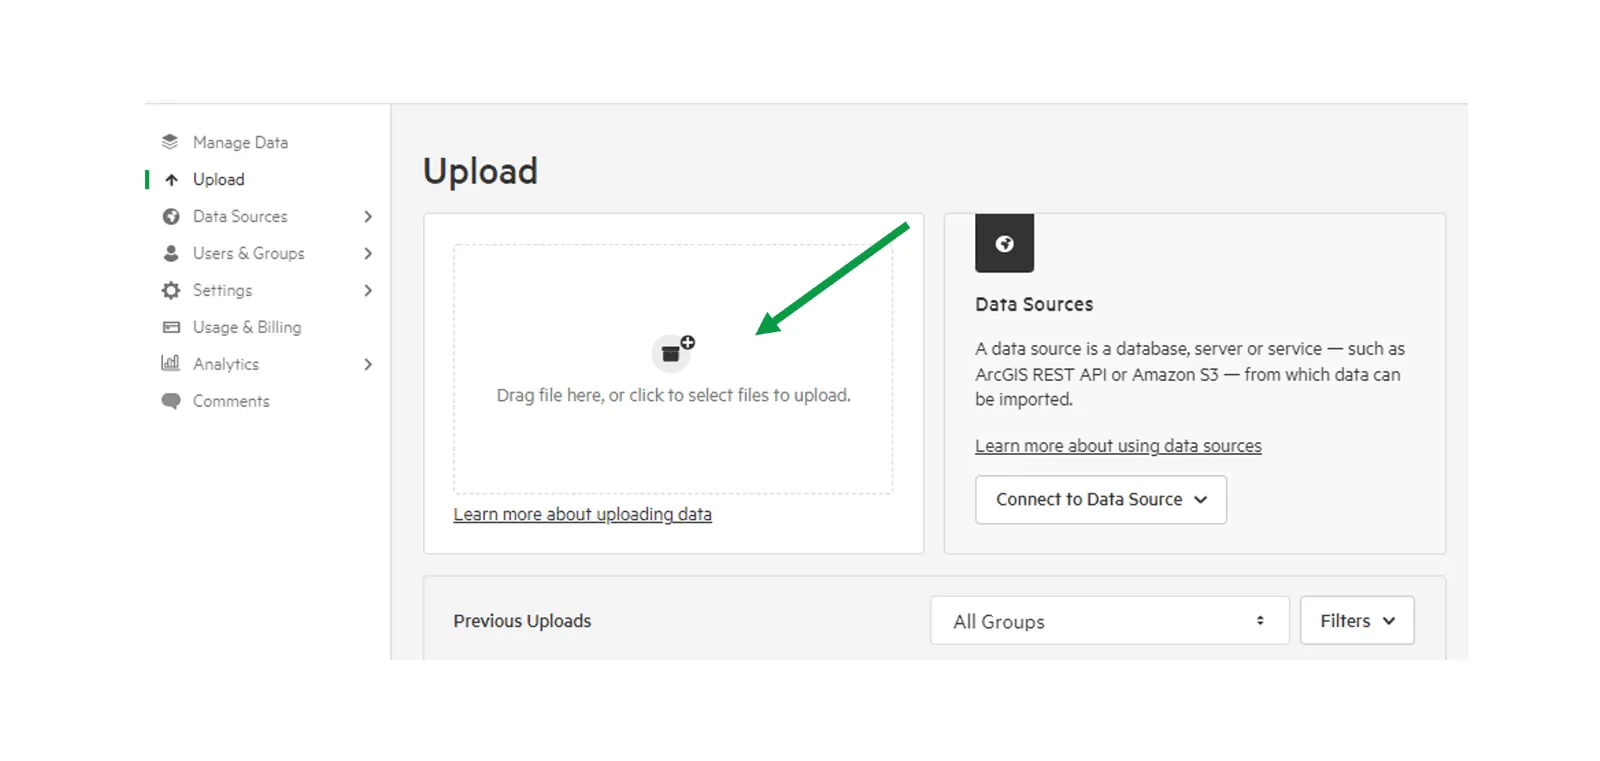
2. Drag and drop the documents you wish to upload
Section titled “2. Drag and drop the documents you wish to upload”You have the option of dragging and dropping multiple documents at once.
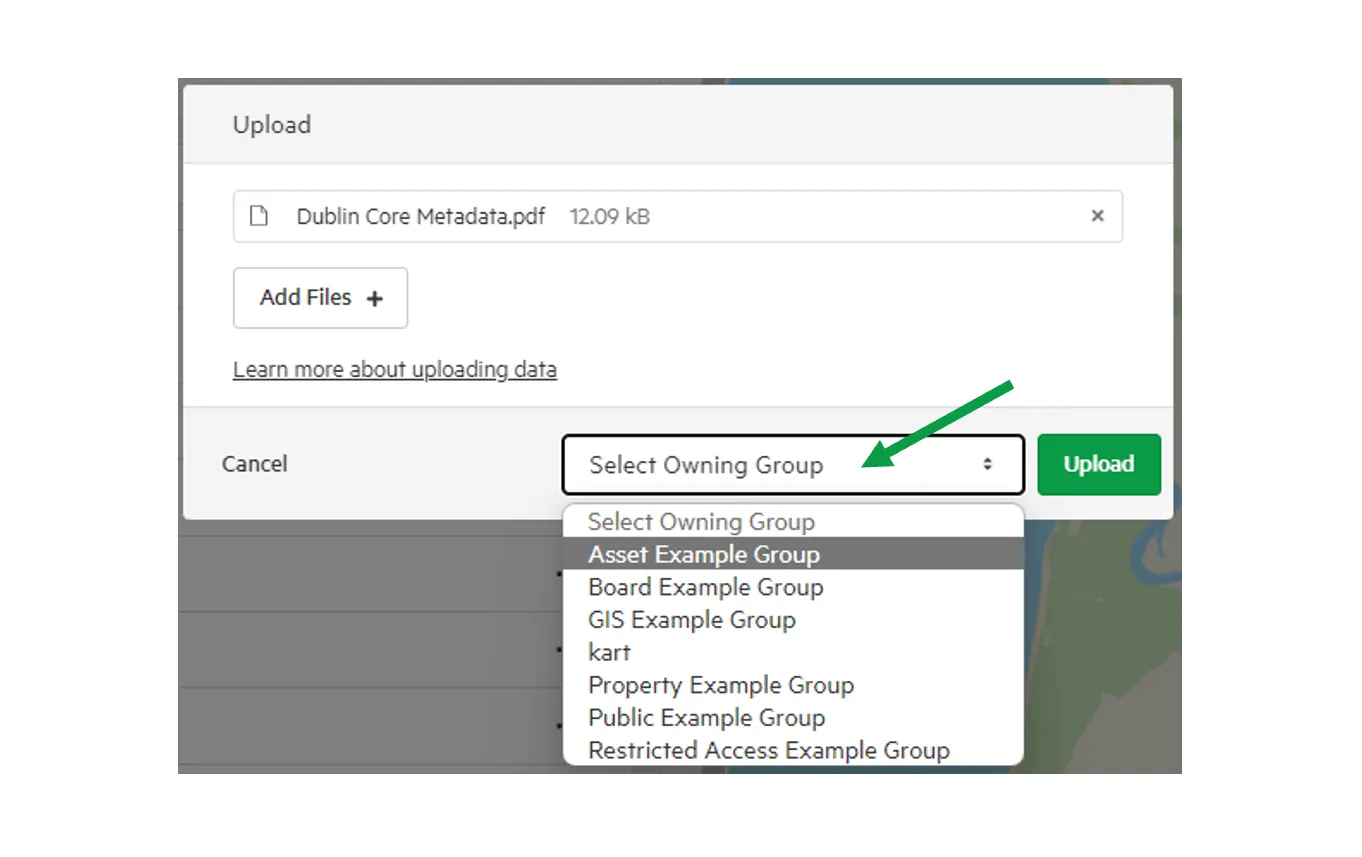
3. Select Owning Group
Section titled “3. Select Owning Group”Select an appropriate group from those listed. The group you select will be the designated owner of the data
4. Click ‘Upload’
Section titled “4. Click ‘Upload’”Koordinates will then process your upload.
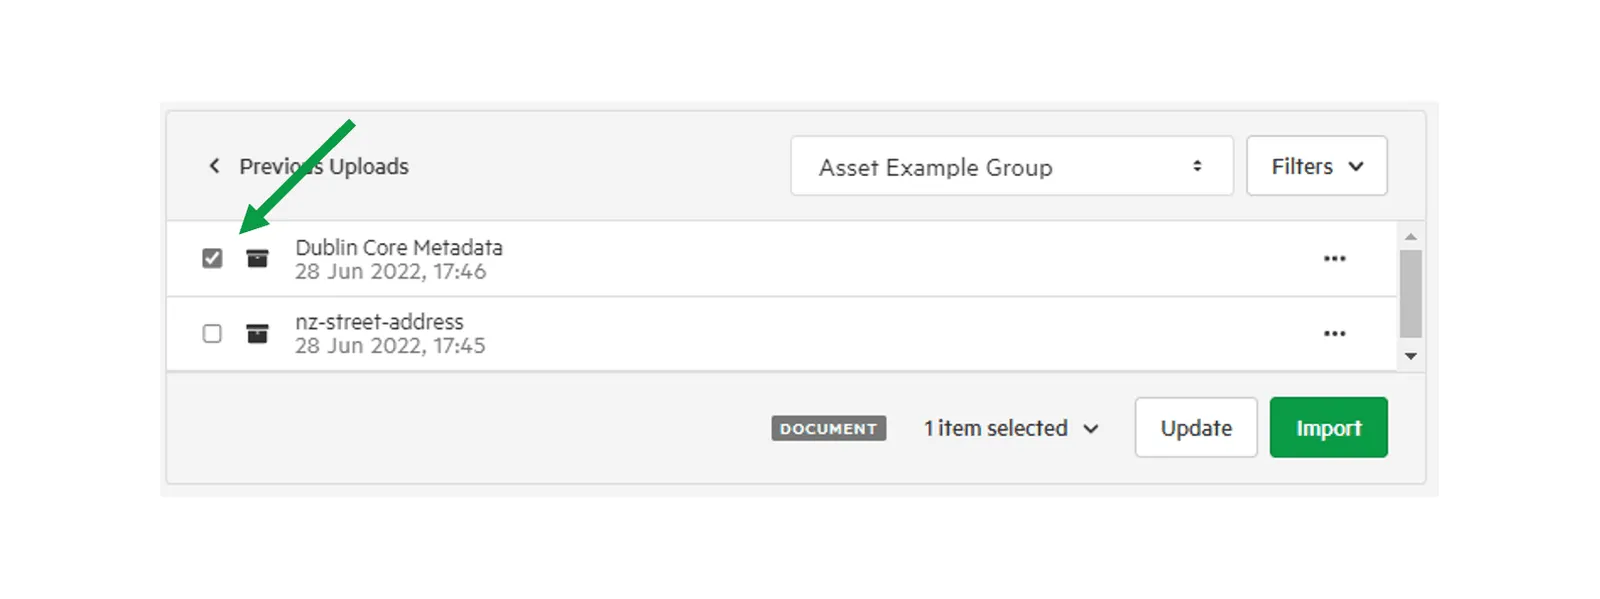
5. Select files to import
Section titled “5. Select files to import”Select the file you wish to import by checking the box next to the file’s title.
6. Click ‘Import’
Section titled “6. Click ‘Import’”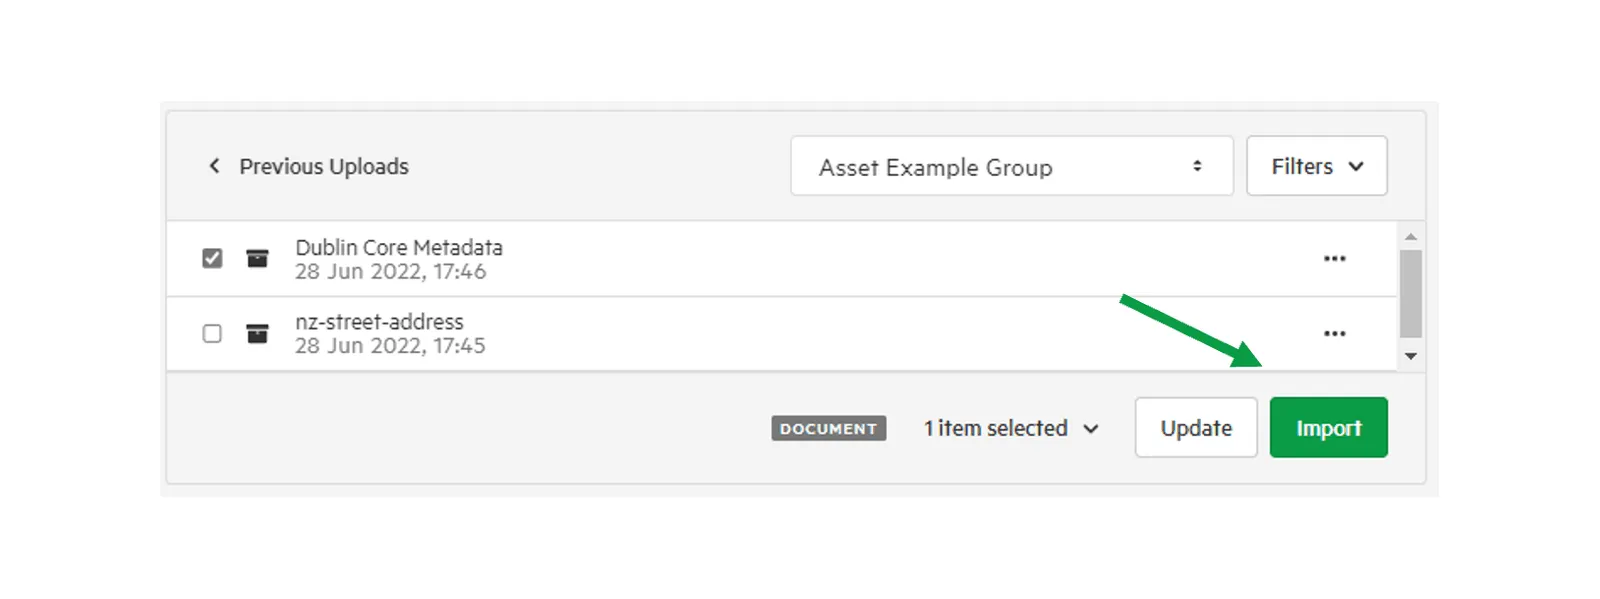
7. Provide additional information about your document
Section titled “7. Provide additional information about your document”Next, you will be able to add information about your document. This includes:
- Title: Rename your document, or keep the default provided by Koordinates.
- Owning Group: Decide which group or individual will be owner the document. Only the owner of the document will be able to remove it from the site, and set administrative privileges.
- Access: Decide if your document will be directly downloadable by anonymous users and indexable by search engines.
- Description: A field to describe the document for users.
- Category: Choose the category to which the document will belong. This will help users find your document.
- Licence: Choose how the document shall be licensed. If you choose ‘Creative Commons,’ you will be asked to decide which Creative Commons licence applies to your work.
8. Click ‘Import and Publish’
Section titled “8. Click ‘Import and Publish’”You also have the option of importing your data as a draft, to perform additional QA checks.