Find & export Point Cloud data layers
In this guide, we give a quick introduction to the process of finding and exporting Point Cloud data layers
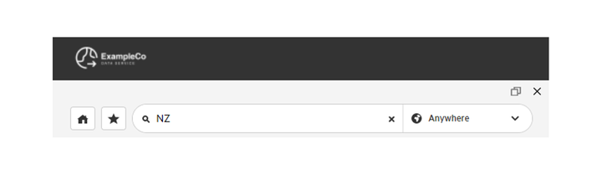
1. Enter your search term
The first thing you need to do is enter a term in the search bar at the top of the screen and click Search
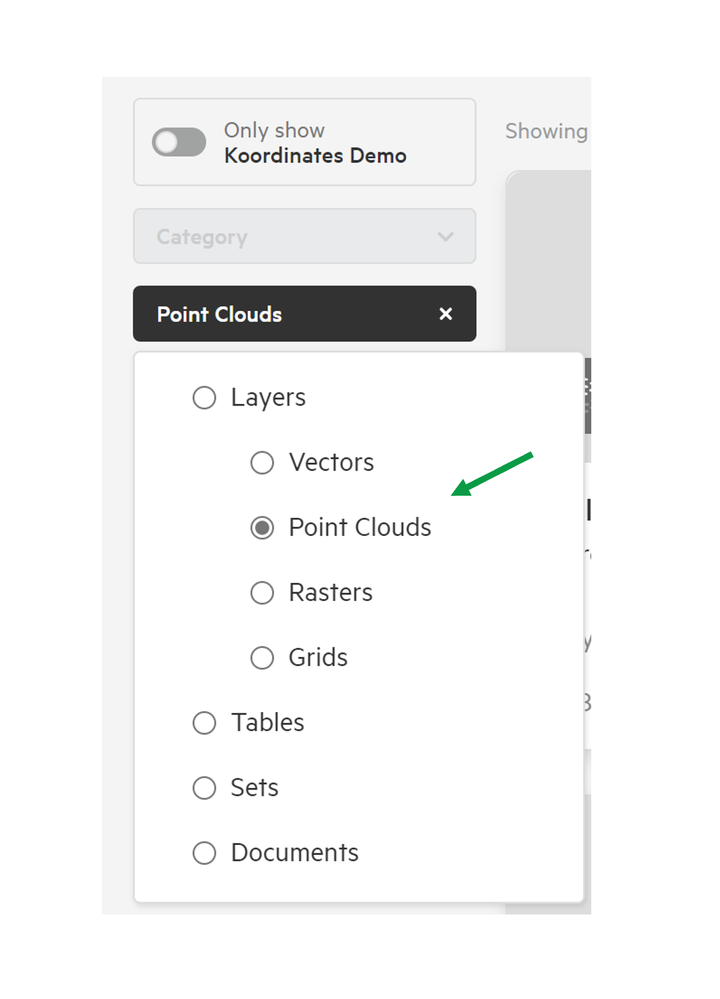
2. Filter your results.
Use the search filters to browse your results. These include Date, License, Group and Access. Under Data Type select Point Cloud.
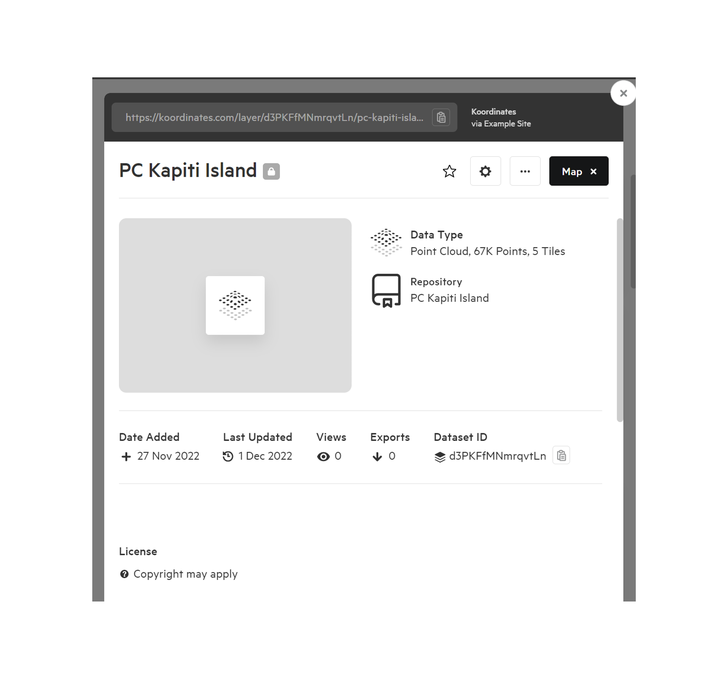
3. To find more information on the data, select the data card, to open the data sheet.
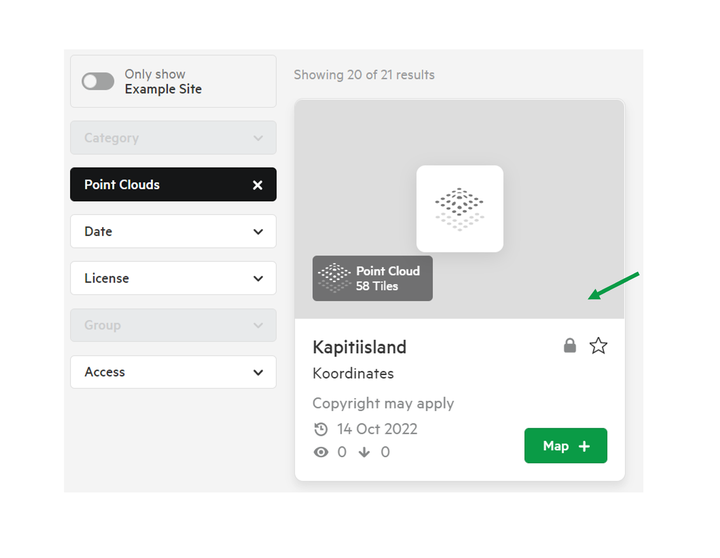
The data sheet includes details including date added and updated, license, the different tables and layers that make up the dataset, including the number of data points that are included.
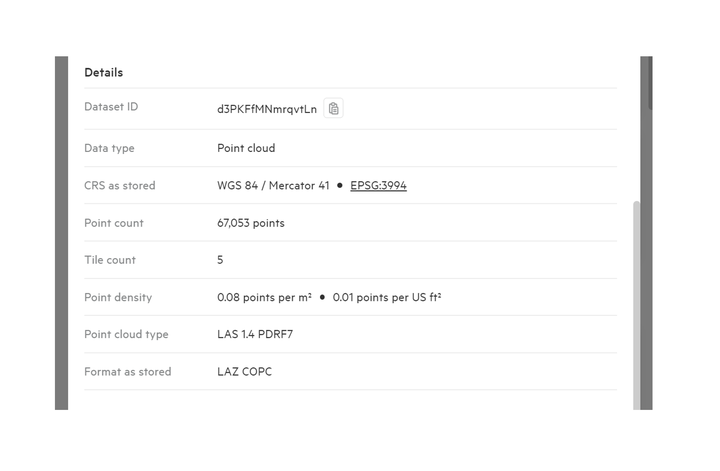
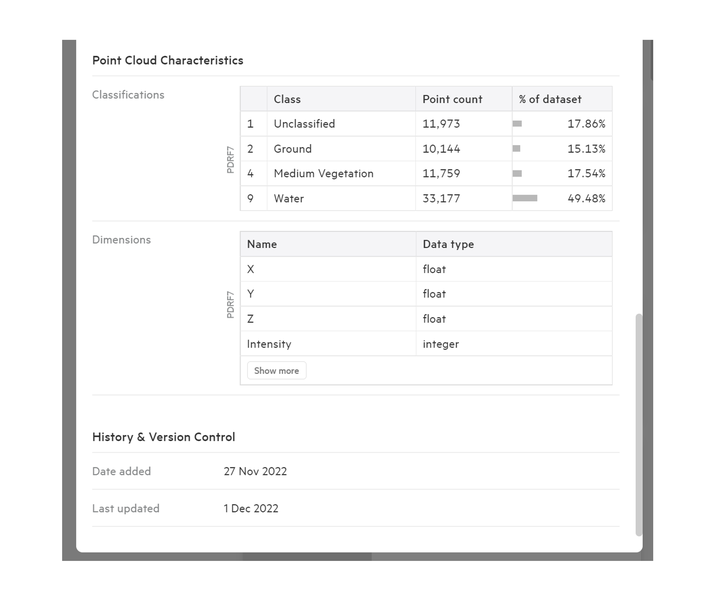
Additional Point Cloud specific information includes data classifications and dimensions of the data, which can provide further insights.
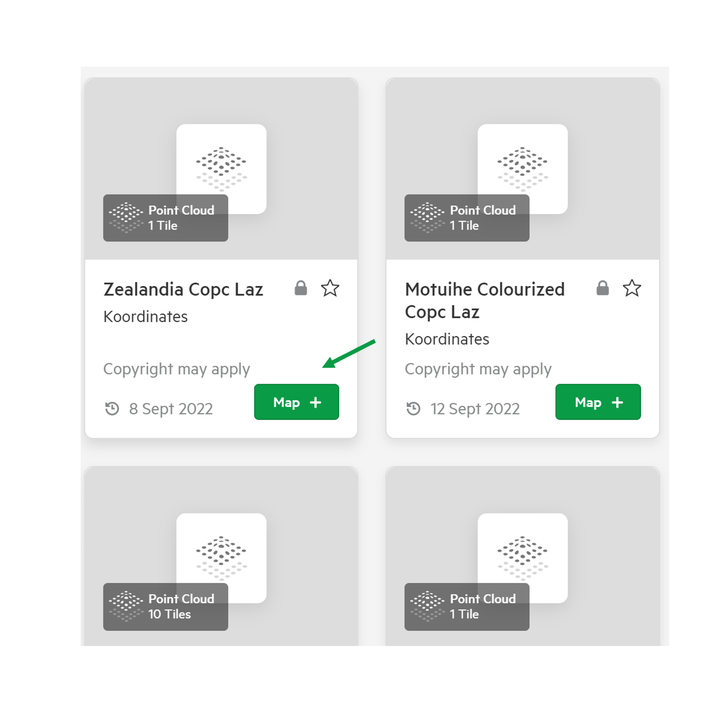
4. Add your data
Click the 'Map +' icon for each data layer you wish to add to your map to export.
Repeat steps 1-4 to add multiple data layers to your collection.
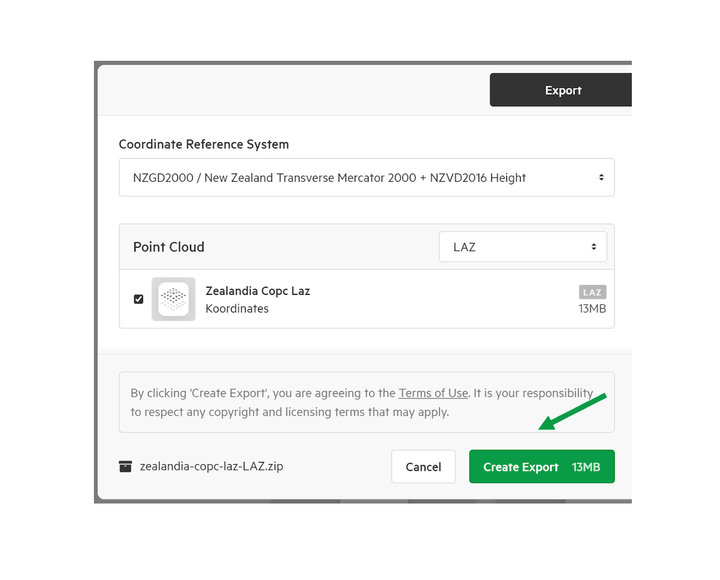
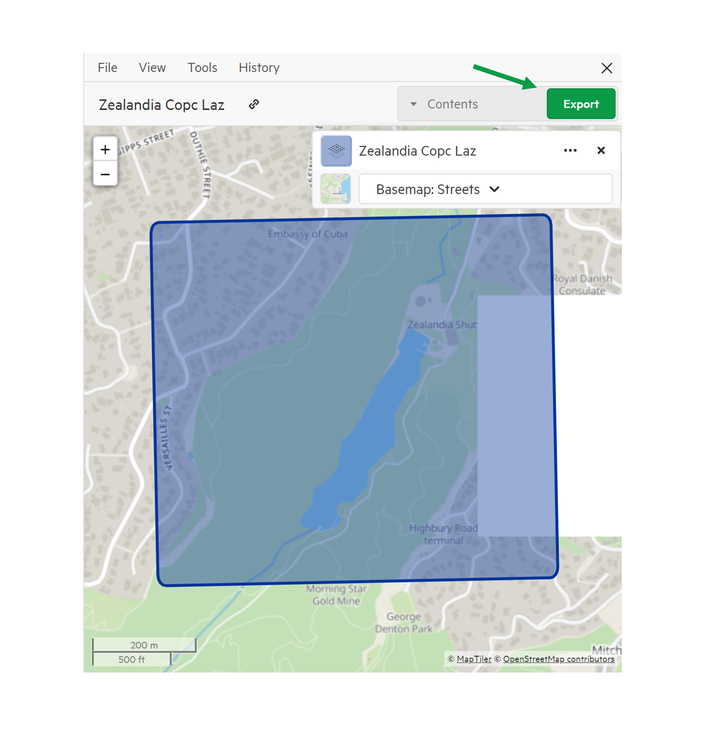
5. Select Export
From the Map Viewer, above the layers, select 'Export'.
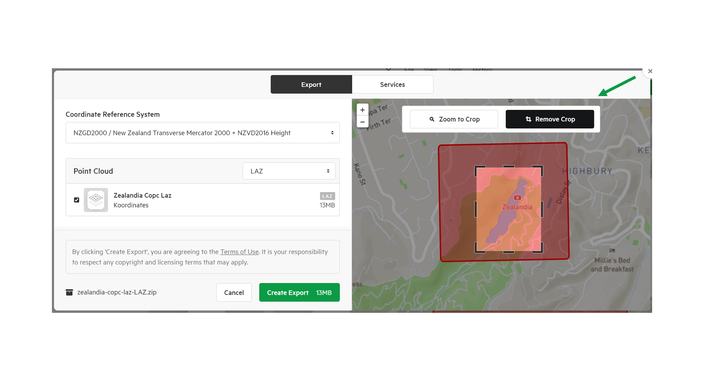
6. Crop your data
Once you have explored and chosen to export your dataset, you may only need to download a small part of it.
To crop your data, select 'Crop' in the small map in the collection pane.
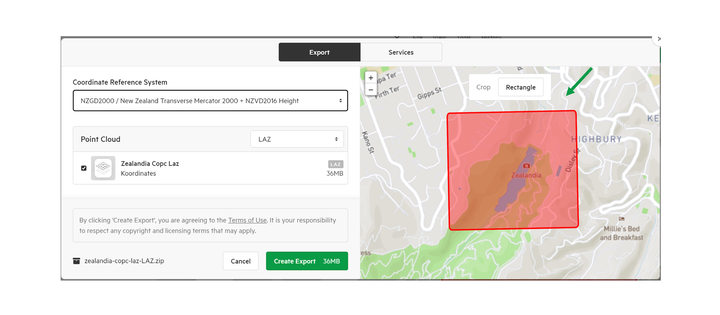
Then, manipulate the crop extent to select only the desired area. This will keep you from downloading extra data that you don't need from outside that area.
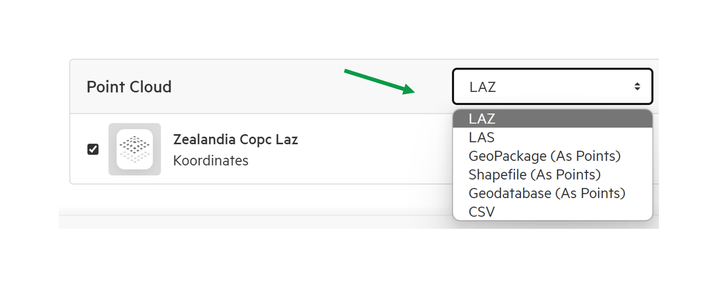
7. Choose your format
The export screen will present you with a range of download options, including LAZ, LAS, GeoPackage, Shapefile, Geodatabases, and CSV.
8. Click Create Export
Once your export is ready, you'll receive an email with a link to a ZIP file.
Note these may be larger than other export files