
Crop data layers by box
When you have one or more downloadable layers in your map, you can crop them before you export. Cropping reduces the size of your export, so you download only the data you need.
1. Open the export window
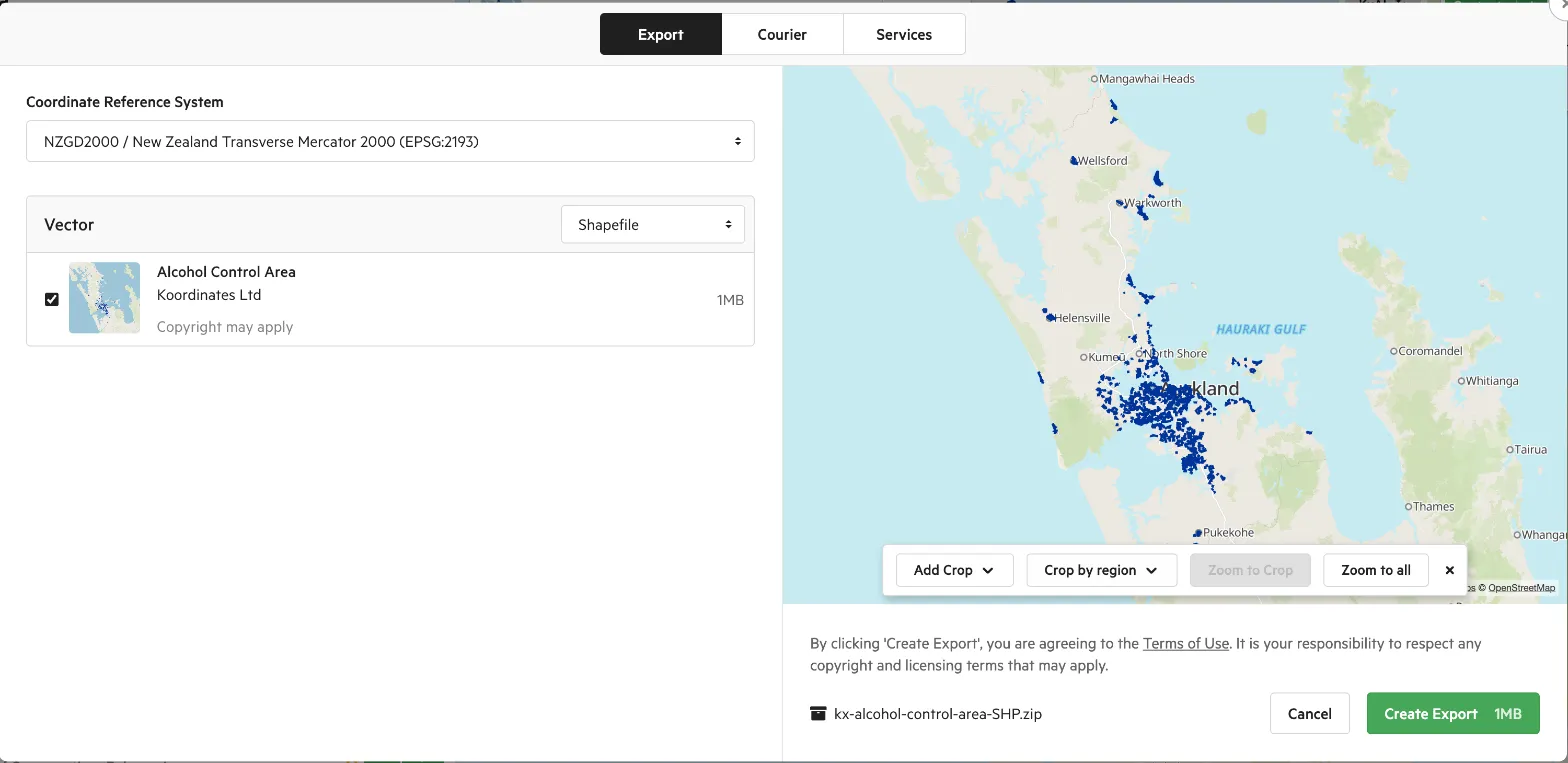
Section titled “1. Open the export window”After adding your data to the map, select Export in the map viewer. The export window opens, with a preview map on the right. From here you can:
- set the Coordinate Reference System to use for the export;
- choose which layers to include, and the file format for each type of data; and
- crop the data.
2. Add a crop
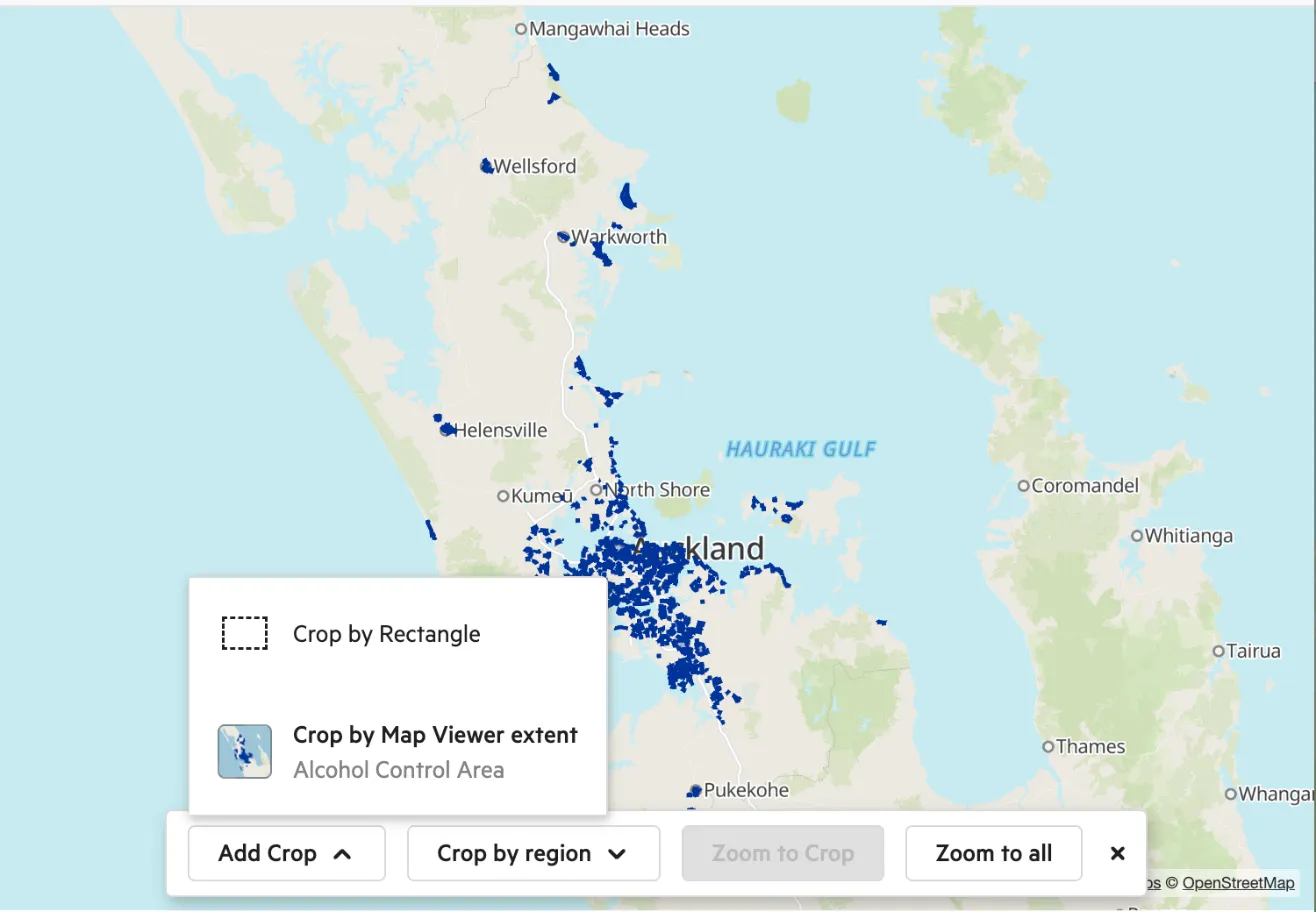
Section titled “2. Add a crop”The crop tools are along the bottom of the preview map. Select Add Crop to add a rectangle crop, or open its dropdown and choose:
- Crop by Rectangle: draws a box you can adjust by dragging its handles.
- Crop by Map Viewer extent: crops to the area currently shown in your map viewer.
If the site has crop regions set up, you can also select Crop by region and choose a region, such as a district or suburb, from the list.
3. Adjust or remove your crop
Section titled “3. Adjust or remove your crop”- Drag the handles of the box to change the crop area. If you started from the map viewer extent, dragging a handle switches to a rectangle crop.
- Select Zoom to Crop to fit the preview map to your crop, or Zoom to all to see all your data.
- To remove the crop, select the x on the crop button. Your export goes back to the full extent of the data.
Layers that fall outside your crop are labelled Outside Crop and aren’t exported.
You can also crop directly in the map viewer: select the crop button next to Export (Show crop in map). The same crop tools appear on the map. Select Close crop to close them.
4. Check the size of your cropped data
Section titled “4. Check the size of your cropped data”The estimated export size is shown on the Create Export button, and updates as you change the crop.
5. Export your cropped data
Section titled “5. Export your cropped data”Select Create Export to start the export.
Additional points
Section titled “Additional points”Vector lines and polygons are clipped to the requested extent, which means that all enclosed features are returned.
Raster crops are converted to the projection of the export and expanded to the new bounding rectangular envelope. In other words: your exported data will be rectangular in the projection requested and will contain at least the data requested.
Use an exact crop area
Section titled “Use an exact crop area”You set the crop box on the map rather than by typing coordinates, so you can’t read back the exact box you drew. If you need the same area every time, for example to match an initial download with later changesets, define the area once as a polygon in WGS 84 (EPSG:4326) and supply it as the extent of an export using the Export API. Keep a note of the polygon so you can compare it with the area covered by your later WFS changeset downloads.
Site administrators can set up the regions. See Set up crop layers for exports.